Each request to Celonis APIs must be authenticated with a registered Celonis Identity. There are multiple ways of authenticating as detailed below.
To be discontinued. Sunsetting milestones will be officially announced.
While it is possible to use API keys and Application keys with Celonis, it's important to note that they are not the industry standard and are therefore not recommended. Both keys have an unlimited lifetime and cannot be “rotated”. This means that users need to delete and recreate them to achieve the equivalent of key rotation, which can be a cumbersome process.
One issue (particularly relevant for API Keys) is that they give any application that uses them complete access to almost all the Celonis APIs (public or private). There is no way to restrict their access to only certain resources.
OAuth 2.0 is a well-established industry standard that makes it easier to integrate customer-managed applications with Celonis. OAuth uses scopes to manage access to resources, which means that the OAuth clients can only access APIs allowed by the scopes they are configured to use.
For example, we can have the scope studio that gives access to Studio or the audit.log:read scope that gives read-only access to audit logs. For an OAuth client to be able to access a certain resource (API), the client must have the OAuth scope and the Celonis permissions to do so. This follows the security principle of least privilege so that an OAuth client only gets the required privilege to perform a certain task and not any additional permissions.
If a 3P application is using an API key or Application key to integrate with Celonis, they should migrate to OAuth 2.0 as soon as possible using the process below:
- Create an OAuth 2.0 client as described in the Using an OAuth 2.0 token section.
- Give the new OAuth 2.0 client permissions on the same packages as your existing Application Key or existing user.
- Configure the application to use OAuth 2.0 authentication method instead of the old Application Key authentication and provide the client ID, the client secret (optional depending on the grant type) and the authentication.
- Refresh and redirect (optional for authorization code grant type) URLs using the endpoints and requests described in the OAuth Endpoints section.
To be discontinued. Sunsetting milestones will be officially announced.
You can find out how to create a user API key by following our User API Keys guide.
The Celonis API uses Bearer Token Authentication for verifying consumer access. The credentials must be sent in an Authorization header in the HTTP request. Credentials sent in the URL or body of the request will be ignored.
To authenticate using Bearer Token Authentication:
- Create the token in the Celonis Platform:
MDg5MGVkNDktNjMwZC00ODdiLTkyNGItMjNmMzMxNjRmM2IwOkhNUVRMUis4SGh6NHhBY21Vck9GaWdkem5rYzBrb3p0N056WUM0bGlqczMM - Include the string in the HTTP Authorization header formatted like this:
Authorization: Bearer MDg5MGVkNDktNjMwZC00ODdiLTkyNGItMjNmMzMxNjRmM2IwOkhNUVRMUis4SGh6NHhBY21Vck9GaWdkem5rYzBrb3p0N056WUM0bGlqczMM
To be discontinued / sunsetting milestones will be officially announced.
You can find out how to create an AppKey by following our Application API Keys guide.
To authenticate using AppKey Authentication:
- Create the AppKey in the Celonis Platform:
MzgyZDEzYjItNjI1MS00NTIwLTk1YTItY2ZjYzMzZTllOTNmOkE3a1dvYnpYQ0c3aUtUdTNRNC9UNzFLUXZmY0E2ZjVXUUROajFoN1R5UzIr - Include the string in the HTTP Authorization header formatted like this:
Authorization: AppKey MzgyZDEzYjItNjI1MS00NTIwLTk1YTItY2ZjYzMzZTllOTNmOkE3a1dvYnpYQ0c3aUtUdTNRNC9UNzFLUXZmY0E2ZjVXUUROajFoN1R5UzIr
To generate tokens using OAuth 2.0, it is necessary to follow the configuration steps described below.
This grant type uses the client’s credentials to access protected data from a resource server. This is suitable for machine-to-machine authentication.
The most common grant type, the authorization server returns a single-use authorization code to the client. The client then exchanges the code for an access token. This capability is in private preview. Contact your Celonis account team to get early access.
With this method, the client sends the $client_id and $client_secret using the Authorization header, in the following format:
- Authorization:
Basic$encoded_credentials.
Here, the value of $encoded_credentials corresponds to the base64 encoding of OAuth client’s $client_id:$client_secret.
The client authenticates itself by providing the $client_id and $client_secret in the HTTP request body as a form parameter. To ask for multiples scopes, each scope should be separated by space.
OAuth can be used as an authentication method for the Celonis Platform, which offers a more secure and flexible way of granting permissions to clients (applications) compared to API keys.
In the Celonis Platform, go to Admin & Settings.
Click Applications.
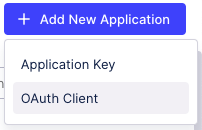
In the upper-right corner, click Add New Application and select "OAuth Client".
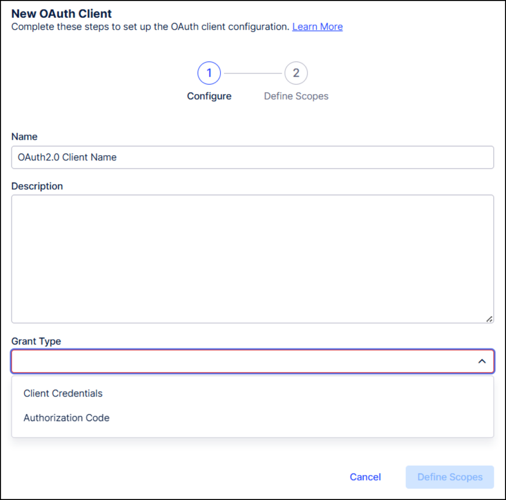
Enter a name for your client.
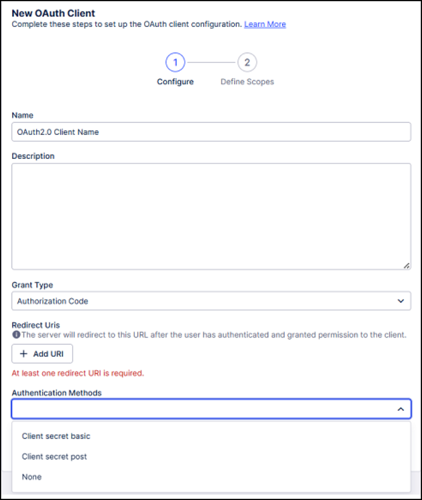
Select one of the supported OAuth grant types: "Client Credentials" or "Authorization Code".
Select one of the supported OAuth authentication methods: "Client secret basic" or "Client secret post".
Click Define scopes. Scopes do not grant any additional permissions beyond what the client has, but instead they specify the access-level that the client needs. Select what levels within the Celonis Platform the clients will have access to based on their granted permissions. Every scope has a name and a description, describing what can be accessed with the scope based on the permissions granted to the client.
Click Create.
As scopes only allow access to the APIs, the created OAuth client should now be assigned permissions to the resources behind those APIs.
After creating a client in the Celonis Platform, developers receive client credentials: client ID and client secret. The client secret must be copied as it cannot be accessed again in the future.
For production solutions, we strongly recommend using OAuth 2.0 instead of static keys.
The authorization endpoint is available at https://<team>.<cluster>.celonis.cloud/oauth2/authorize.
The token endpoint is available at https://<team>.<cluster>.celonis.cloud/oauth2/token.
This endpoint is specified by the consumer.
OAuth token generation request (client_credentials)
curl --request POST \
  --url https://<team>.<cluster>.celonis.cloud/oauth2/token \
  --header 'content-type: multipart/form-data' \
  --form client_id=<client id> \
  --form client_secret=<client secret> \
  --form grant_type=client_credentials \
  --form scope=<scope1 scope2 scopeN>
OAuth token generation request (authorization_code)
Initiating the Authorization Code flow is a two-step process:
Step 1: Request Authorization Code. A GET request to the authorize endpoint to receive an authorization code.
curl --request GET \
--url 'https://<team>.<cluster>.celonis.cloud/oauth2/authorize?response_type=code&client_id=<client id>&scope=<scope1 scope2 scopeN>&redirect_uri=<redirect uri>&state=<state string>'
Step 2: Exchange Code for Access Token. Exchange the authorization code received in Step 1 for an access token.
curl --request POST \
    --url <https://<team>.<cluster>.celonis.cloud/oauth2/token \
    --header 'content-type: application/x-www-form-urlencoded' \
    --data-urlencode 'grant_type=authorization_code' \
    --data-urlencode 'code=<authorization code from step 1>' \
    --data-urlencode 'redirect_uri=<redirect uri>' \
    --data-urlencode 'client_id=<client id>' \
    --data-urlencode 'client_secret=<client secret>' \
    --data-urlencode 'state=<state string from step 1>'
OAuth token renewal request
curl --request POST \
  --url https://<team>.<cluster>.celonis.cloud/oauth2/token \
  --header 'content-type: multipart/form-data' \
  --form client_id=<client id> \
  --form client_secret=<client secret> \
  --form refresh_token=<refresh token> \
  --form grant_type=refresh_token \
  --form scope=<scope1 scope2 scopeN>
OAuth token response
{
	"access_token": "eyJraWQiOiJkZXZlbG9wLWVzMzg0IiwiYWxnIjoiRVMzODQifQ.eyJhdWQiOlsiYjllMzgwZDYtMmUxZS00MmQ5LWI3YjUtZTJkZDI5MGYxZTU5IiwiYXBpbmF1dHMuZGV2ZWxvcC5jZWxvbmlzLmNsb3VkIl0sIm5iZiI6MTcxMjEzNDU4NywiYXpwIjoiYjllMzgwZDYtMmUxZS00MmQ5LWI3YjUtZTJkZDI5MGYxZTU5Iiwic2NvcGUiOlsib3BlbmlkIl0sImlzcyI6Imh0dHBzOi8vYXBpbmF1dHMuZGV2ZWxvcC5jZWxvbmlzLmNsb3VkIiwiZXhwIjoxNzEyMTM1NDg3LCJpYXQiOjE3MTIxMzQ1ODcsImp0aSI6IjI2ZjlhNTU3LWQwMTEtNDcyNy05MTNhLWU3NmU3MDIzMTkyMyJ9.XIBj89ymumPaDL_InAsuWiL_6e5GeMpDGgPz3cZNWF3rNzNTc4GRAXMrtBjU9Gg6SWpyqPK0tTaTsrf88fmc0MboYXvKH0CxtpqWlDp0h_QSRMb1ZsCD226kv83xbh86",
	"scope": "scope1 scope2 scopeN",
	"token_type": "Bearer",
	"expires_in": 899
}For security reasons, you may need to regenerate the client secret.
- Navigate to Admin & Setting > Applications.
- Find the OAuth client.
- Click the three dots menu on the right and select Regenerate Secret.
After generating the new client secret, make sure to update it in any integration where this client is used.
During OAuth authorization flows, users can give consent to OAuth clients to access resources on their behalf. To view which OAuth clients have been granted consent:
- Navigate to Edit Profile.
- Go to the OAuth Client Management section to view which applications (OAuth clients) have been granted consent.
- You can also revoke a consent by clicking on Edit and then selecting Revoke Consent for the corresponding client.
The Celonis API uses Bearer Token Authentication to verify consumer access. The credentials must be sent in an Authorization header in the HTTP request.
Credentials sent in the URL or body of the request will be ignored.
To authenticate using Bearer Token Authentication:
- Call the token endpoint (
https://< team-url >/oauth2/token) to issue a new token or renew an existing token. - Include the
access_tokenin the HTTP Authorization header formatted like this:Authorization: Bearer eyJraWQiOiJkZXZlbG9wLWVzMzg0IiwiYWxnIjoiRVMzODQifQ.eyJhdWQiOlsiYjllMzgwZDYtMmUxZS00MmQ5LWI3YjUtZTJkZDI5MGYxZTU5IiwiYXBpbmF1dHMuZGV2ZWxvcC5jZWxvbmlzLmNsb3VkIl0sIm5iZiI6MTcxMjEzNDU4NywiYXpwIjoiYjllMzgwZDYtMmUxZS00MmQ5LWI3YjUtZTJkZDI5MGYxZTU5Iiwic2NvcGUiOlsib3BlbmlkIl0sImlzcyI6Imh0dHBzOi8vYXBpbmF1dHMuZGV2ZWxvcC5jZWxvbmlzLmNsb3VkIiwiZXhwIjoxNzEyMTM1NDg3LCJpYXQiOjE3MTIxMzQ1ODcsImp0aSI6IjI2ZjlhNTU3LWQwMTEtNDcyNy05MTNhLWU3NmU3MDIzMTkyMyJ9.XIBj89ymumPaDL_InAsuWiL_6e5GeMpDGgPz3cZNWF3rNzNTc4GRAXMrtBjU9Gg6SWpyqPK0tTaTsrf88fmc0MboYXvKH0CxtpqWlDp0h_QSRMb1ZsCD226kv83xbh86
Scopes do not grant any additional permissions beyond what the client has. Instead, they specify the access-level that the client needs. Every scope has a name and a description, describing what can be accessed with the scope based on the permissions granted to the client.
| Scope Name | Scope Description |
|---|---|
intelligence.knowledge-models:read | Allows read access to Knowledge Models and their data, filters, records, KPIs, OData metadata, specs, and triggers (based on granted permissions). |
intelligence.subscriptions:manage | Allows managing subscriptions to Knowledge Model triggers, including creation, updates, and event replay, based on granted permissions. |
intelligence.conversations:write | Gives access to Studio Copilot conversational API. |
user-provisioning.scim | Gives access to the SCIM API. |
audit.log:read | Gives read-only access audit logs. |
integration.data-pools | Gives access to data pools. |
integration.data-pools:data_push | Gives access to push data to data pools. |
integration.data-pools:continuous_data_push | Gives access to continuously push data to data pools. |
platform-adoption.tracking-events:read | Gives read-only access to platform-adoption tracking-events. |
team.user-group-info:read | Gives read-only access to team user and group information. |
team.login-history:read | Gives read-only access to team login history. |
task-mining.gateway | Gives access to Task Mining Gateway integration API. |
task-mining.metadata:read | Gives read-only access to Task Mining user metadata. |
action-engine.projects | Gives access to projects. |
machine-learning | Gives access to Machine Learning Workbench API. |
You must set the right permissions and ensure the User API Key or the Application API Key leveraged for authorization purposes has access to the Celonis resources you would like to access through the APIs.