Jumpstart your configuration by creating a custom extractor by uploading the extractor template in Celonis that you can download here. If you do not want to use the extractor template in Celonis and prefer to manully configure your extractor, proceed to the next section.
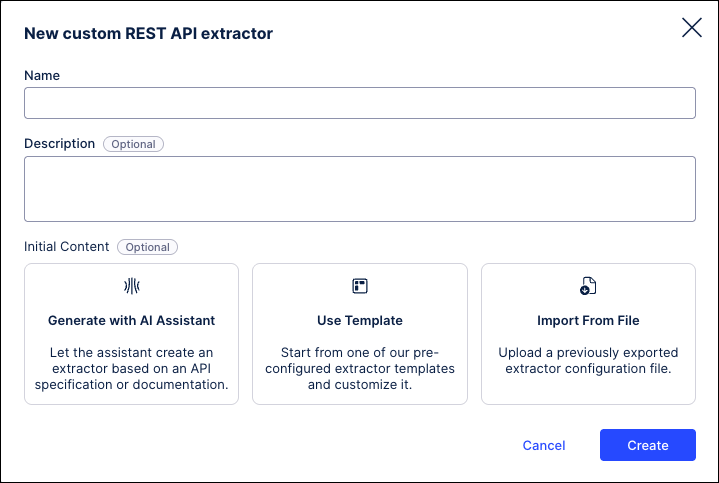
In the New custom REST API extractor window, select the "Import From File" option and upload the template.
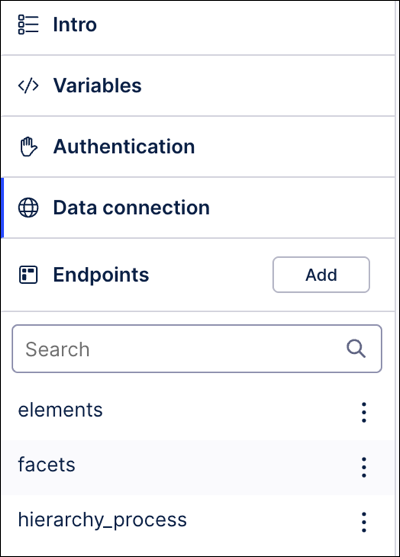
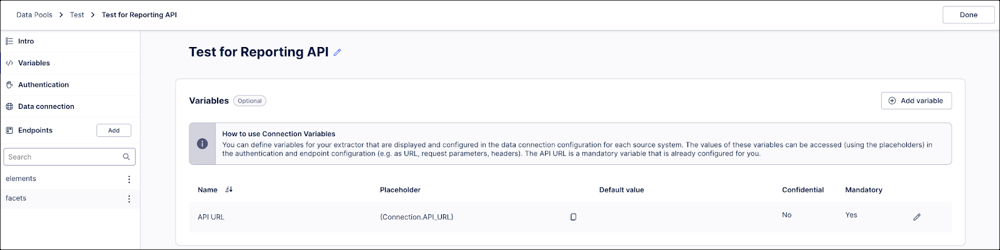
After the extractor is created, you will find that the Endpoint has been configured for you, including "elements", "facets", and an example "hierarchy" for the Processes facet.
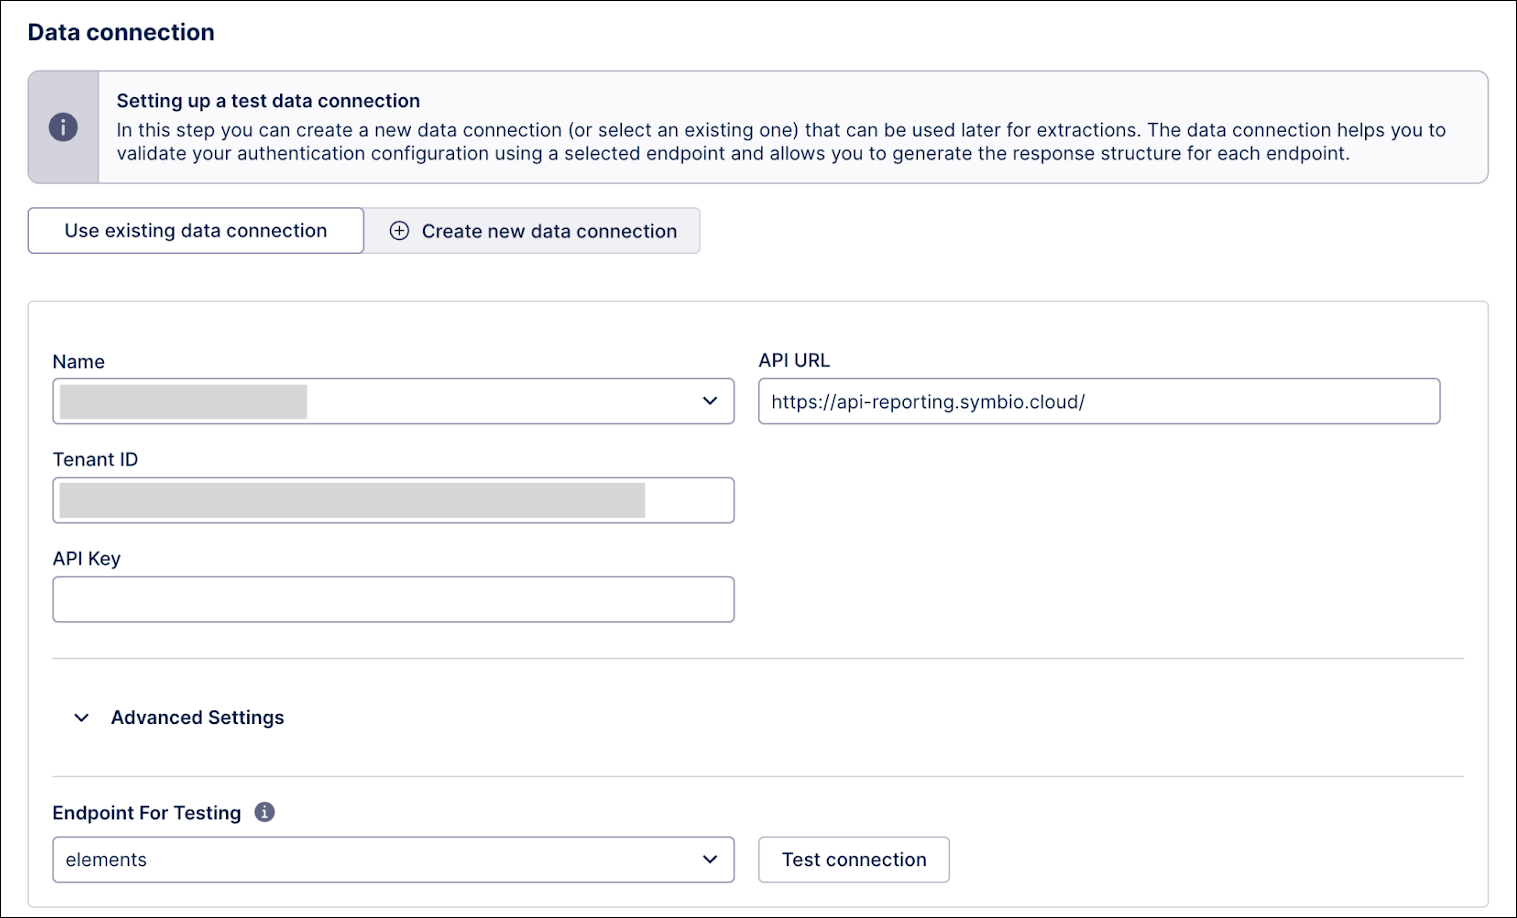
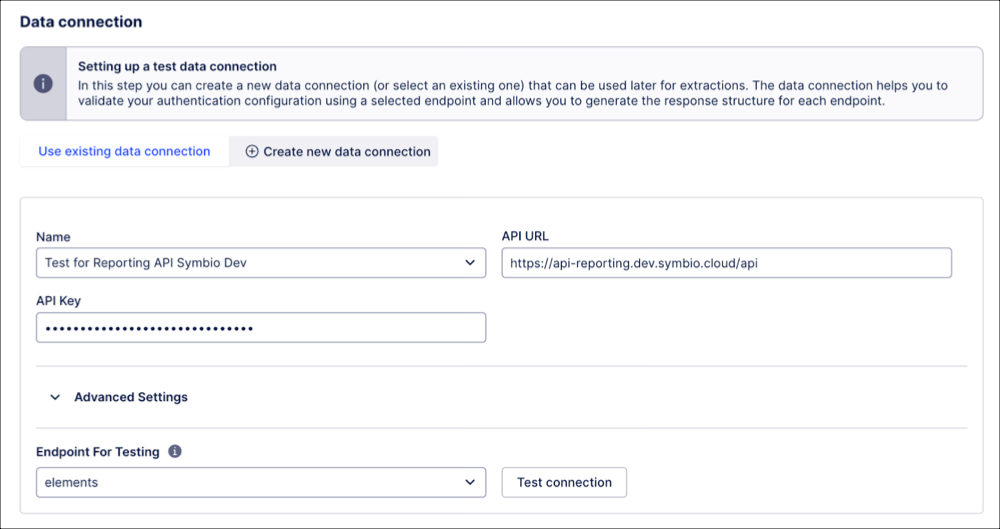
To create the connection with your environment, go to the “Data connection” tab and fill in the empty fields using the values listed below.
| Field Name | Details | Expected Value |
|---|---|---|
| Name | The name of your connection. | Not prefilled, free-text value. |
| API URL | URL that identifies the API provider. | Enter the URL for your specific region:
|
| Tenant ID | This is a unique ID to identify your data location. Currently it can only be found by opening either the Navigator or Admin App and checking the URL of the page after it has fully loaded. | Not prefilled, you can find it via: the first GUID of the Navigator URL: https://navigator.symbio.cloud/celonis/c592ade4-4a5a-4804-a6e0-267f6a164fc6or the “tenant” section of the Admin App URL: https://admin.symbio.cloud/?company=celonis&tenant=c592ade4-4a5a-4804-a6e0-267f6a164fc6 |
| API Key | The API key can be generated using the Admin App within the “Reporting” section. | Format of theAPI key. Not prefilled. |
Once your connection is configured, you will need to wait for the fullfetch cycle to run overnight before any data is shown or the nested tables are displayed. See After the connection is created below for more inforation.
For more information on setting up this connection, see Creating a custom REST API extractor / using a pre-built template.
This section provides an example of how a custom connection would look when using the Reporting API.
In Data integration, the user can go to the Extractor builder and build their own extractor based on an API. Here, we will use our API to set up the connection.
To use the API connection, your configuration should look like this:
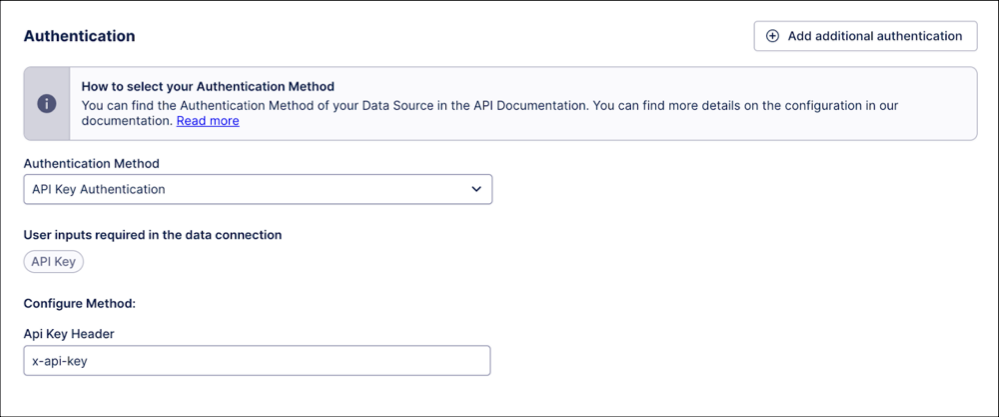
Select “API Key Authentication” as the Authentication Method.
In the API URL field, add the applicable value from the table below based on your region.
The server region of the reporting API will match the region of your Admin App URL.
| Domain Region | Value | Description |
|---|---|---|
| Europe | https://api-reporting.symbio.cloud/ | For customers deployed to the Europe region. |
| U.S. | https://api-reporting.us-1.symbio.cloud/ | For customers deployed to the U.S. region. |
| Japan | https://api-reporting.jp-1.symbio.cloud/ | For customers deployed to the Japan region. |
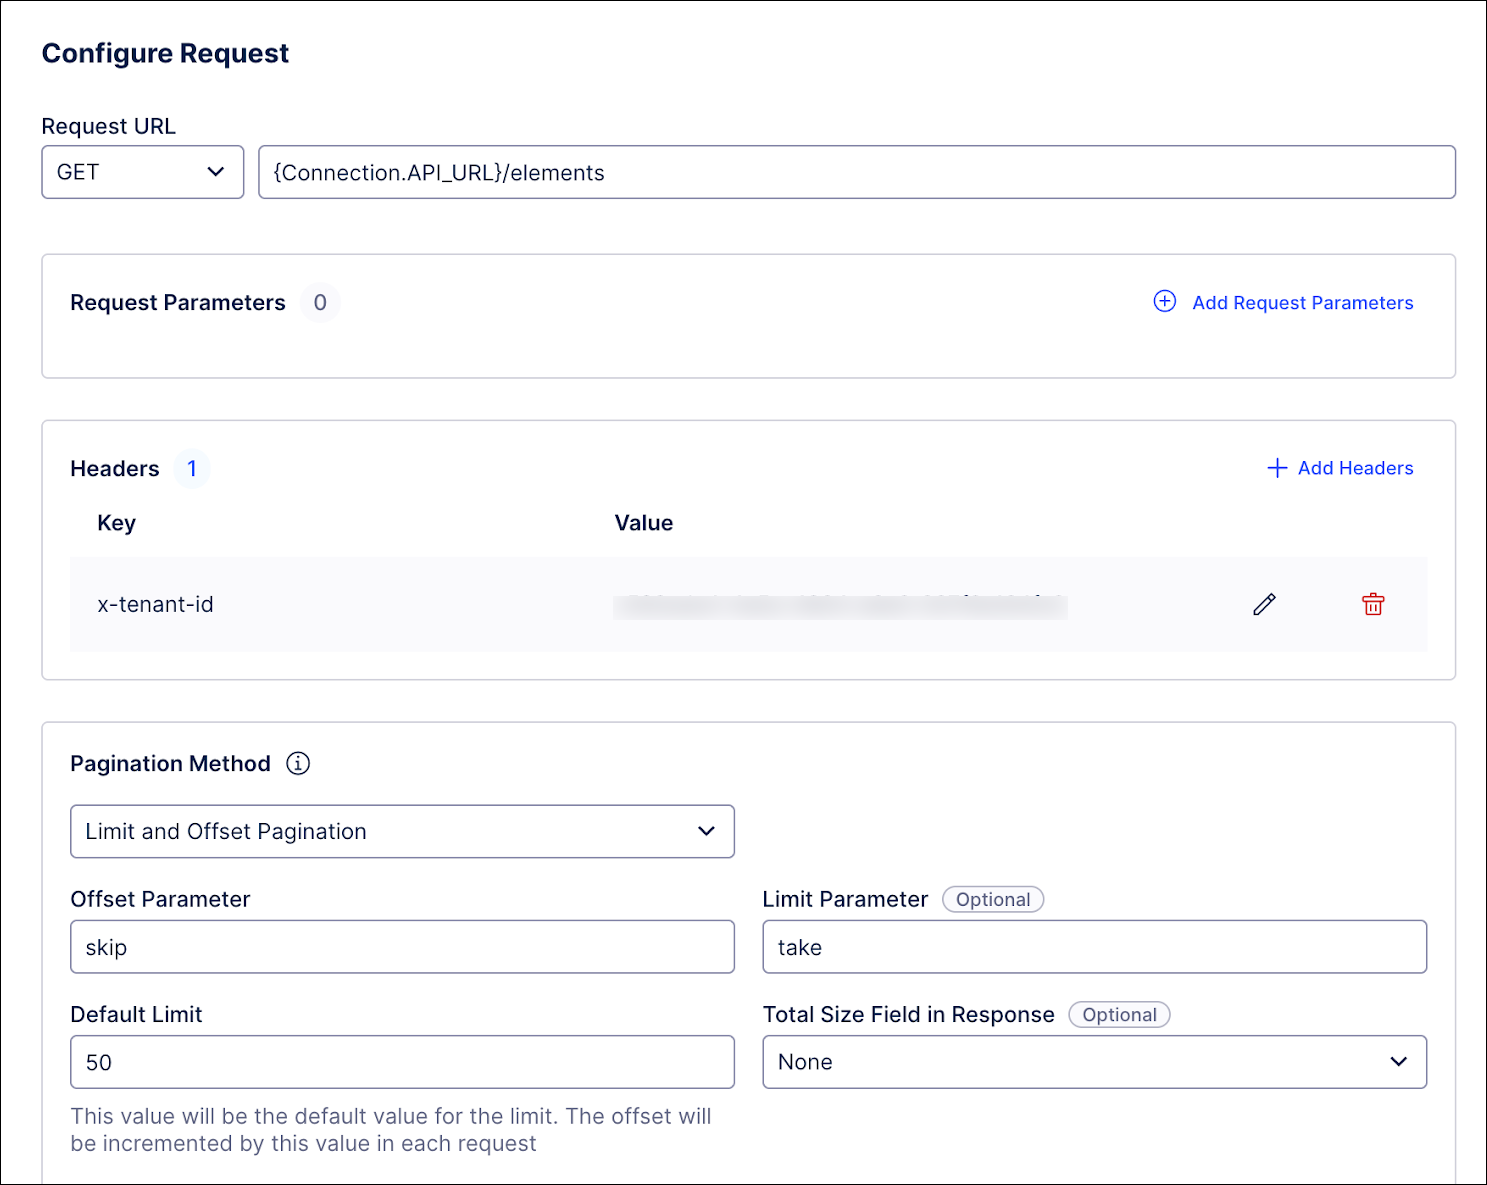
In the Pagination Method section, enter "skip" as Offset Parameter and "take" as Limit Parameter. Then set a default limit. Note that the maximum limit is 100, which will be applied if no limit is set.
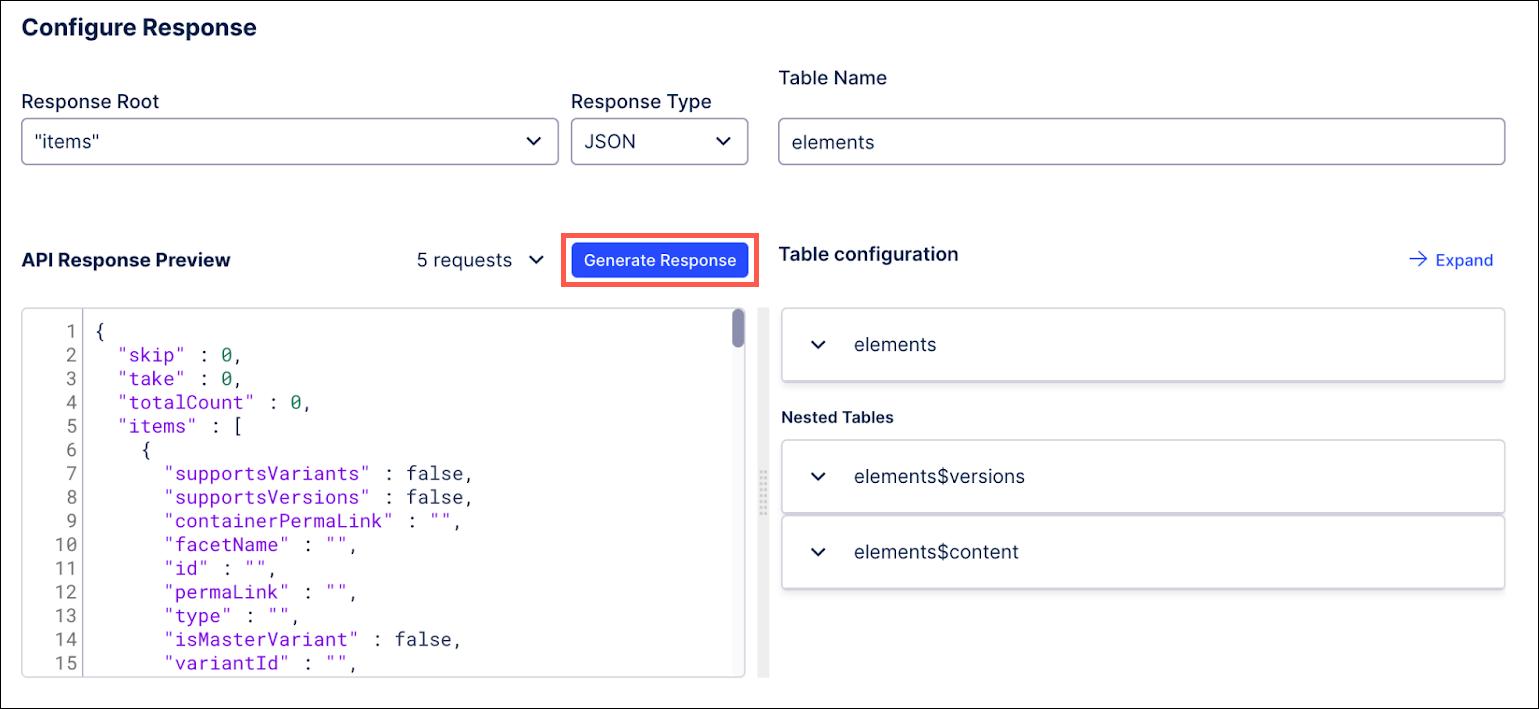
After creating a successful connection, you will initially not see any data and you will not find all the nested tables. Since the API is based on the fullfetch cycle, you will need to wait overnight before you start to see data coming through. Make sure to check the extractor after this cycle has run and click the Generate Response button to see all nested tables.
In some cases, you might see that your extraction failed even though your extraction connection test was successful. You might see a warning in your logs that looks like this:
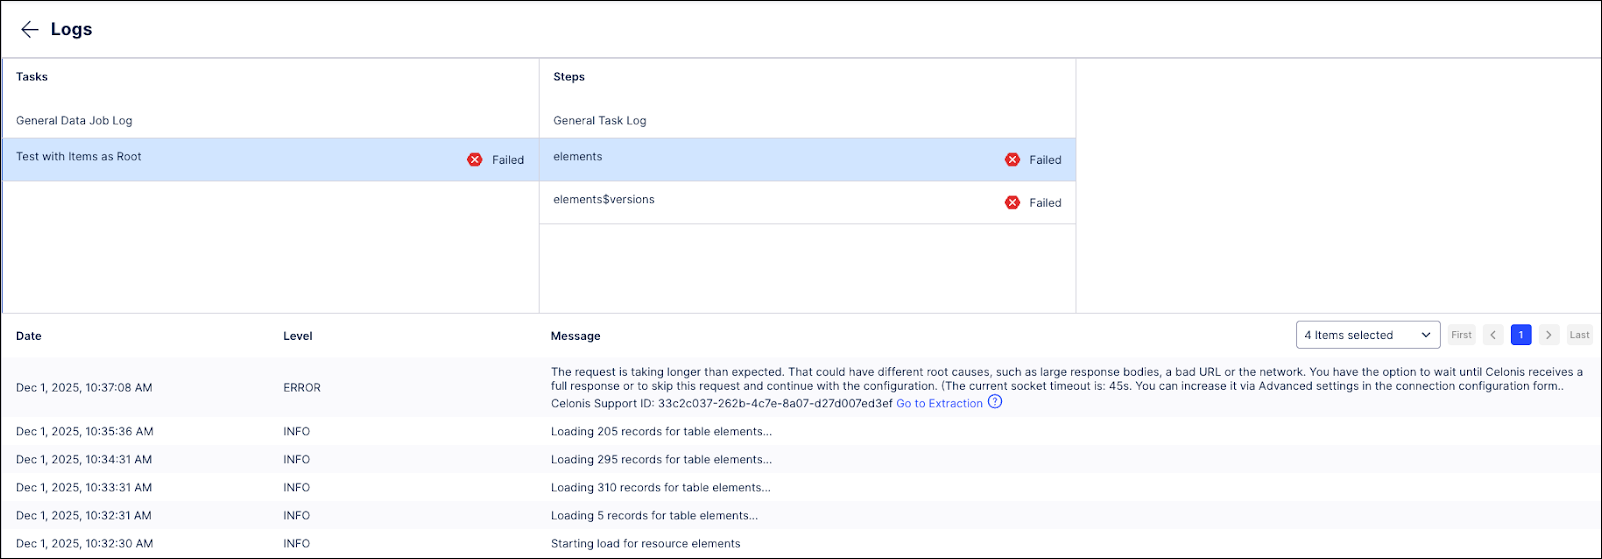
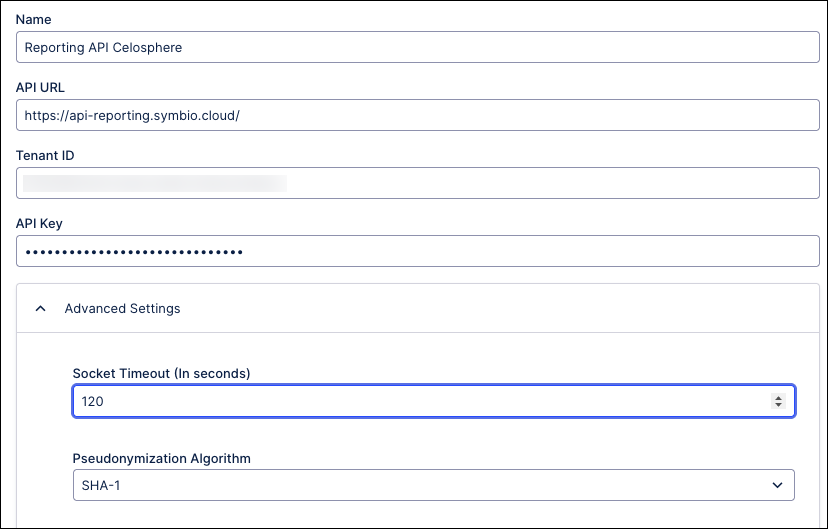
To resolve this issue, add more time to the Socket Timeline field within your extraction configuration. This should allow you to extract the data.
With this data connection, you can then create transformation to make usable data tables. Here is an example transformation script:
CREATE OR REPLACE VIEW Element AS
SELECT
   -- Unique ID for the Element
   CASE
       WHEN T.source_table = 'elements' THEN T.original_id                  -- For non-versionable elements
       WHEN T.source_table = 'elements$versions' THEN T.original_version_id -- For versionable elements
       WHEN T.source_table IN ('elements$content', 'elements$versions$content') THEN T.original_id -- For content items (their own 'id' is unique GUID)
   END AS _id,
   T.source_table, -- Helps identify where the record originated ('elements', 'elements$versions', 'elements$content', 'elements$versions$content')
   T.original_id, -- Original 'id' from the source table (PK for elements and content)
   T.original_version_id, -- Original 'versionId' from elements$versions (PK for versions)
   T.parent_fk_id, -- Original FK from content tables to their parent element/version

   T.supportsVariants,
   T.supportsVersions, -- FALSE for content objects
   T.containerPermaLink,
   T.facetName,
   T.permaLink,
   T.type,
   T.variantId,
   T.creationId,

   -- Common Attributes (renamed for consistency)
   T.attributes_changedOn,
   T.attributes_createdOn,
   T.attributes_gotoUrl,
   T.attributes_name,
   T.attributes_state1,
   T.attributes_description,

   -- Attributes specific to elements$versions (will be NULL for non-versioned elements and all content)
   T.attributes_isReleased,
   T.attributes_isLastInProcessOrReleased,
   T.attributes_majorVersion,
   T.attributes_minorVersion,
   T.attributes_reviewDate,
   T.attributes_validFrom,
   T.attributes_validUntil,
   T.attributes_version,
   T.attributes_reasonForRevision,
   T.attributes_imageUrl,
   T.attributes_stereotype,
   T.attributes_id_from_version, -- The 'id' attribute from versions
   T.stereotype -- The 'stereotype' column from elements$versions

FROM (
   -- Data from 'elements' table (non-versionable parent elements)
   SELECT
       'elements' AS source_table,
       e.id AS original_id,
       NULL AS original_version_id,
       NULL AS parent_fk_id,
       e.supportsVariants,
       e.supportsVersions,
       e.containerPermaLink,
       e.facetName,
       e.permaLink,
       e.type,
       e.variantId,
       e.creationId,
       e."attributes$changedOn$127" AS attributes_changedOn,
       e."attributes$createdOn$127" AS attributes_createdOn,
       e."attributes$gotoUrl$1033" AS attributes_gotoUrl,
       e."attributes$name$1033" AS attributes_name,
       e."attributes$state1$127" AS attributes_state1,
       e."attributes$description$1033" AS attributes_description,
       NULL AS attributes_isReleased,
       NULL AS attributes_isLastInProcessOrReleased,
       NULL AS attributes_majorVersion,
       NULL AS attributes_minorVersion,
       NULL AS attributes_reviewDate,
       NULL AS attributes_validFrom,
       NULL AS attributes_validUntil,
       NULL AS attributes_version,
       NULL AS attributes_reasonForRevision,
       NULL AS attributes_imageUrl,
       NULL AS attributes_stereotype,
       NULL AS attributes_id_from_version,
       NULL AS stereotype
   FROM
       elements AS e
   WHERE
       e.supportsVersions IS FALSE -- Only non-versionable top-level elements

   UNION ALL

   -- Data from 'elements$versions' table (versionable parent elements - specific versions)
   SELECT
       'elements$versions' AS source_table,
       ev.id AS original_id, -- This is the FK to elements.id, but versionId is the primary identifier for this record
       ev.versionId AS original_version_id,
       NULL AS parent_fk_id,
       NULL as supportsVariants,
       NULL as supportsVersions,
       ev.containerPermaLink,
       ev.facetName,
       ev.permaLink,
       ev.type,
       ev.variantId,
       ev.creationId,
       ev."attributes$changedOn$127" AS attributes_changedOn,
       ev."attributes$createdOn$127" AS attributes_createdOn,
       ev."attributes$gotoUrl$1033" AS attributes_gotoUrl,
       ev."attributes$name$1033" AS attributes_name,
       ev."attributes$state1$127" AS attributes_state1,
       ev."attributes$description$1033" AS attributes_description,
       ev."attributes$isReleased$127" AS attributes_isReleased,
       ev."attributes$isLastInProcessOrReleased$127" AS attributes_isLastInProcessOrReleased,
       ev."attributes$majorVersion$127" AS attributes_majorVersion,
       ev."attributes$minorVersion$127" AS attributes_minorVersion,
       ev."attributes$reviewDate$127" AS attributes_reviewDate,
       ev."attributes$validFrom$127" AS attributes_validFrom,
       ev."attributes$validUntil$127" AS attributes_validUntil,
       ev."attributes$version$127" AS attributes_version,
       ev."attributes$reasonForRevision$127" AS attributes_reasonForRevision,
       ev."attributes$imageUrl$127" AS attributes_imageUrl,
       ev."attributes$stereotype$127" AS attributes_stereotype,
       ev."attributes$id$127" AS attributes_id_from_version,
       ev.stereotype
   FROM
       "elements$versions" AS ev
   WHERE
       ev.versionId IS NOT NULL -- Only valid versions
...

) AS T;

CREATE OR REPLACE VIEW Content AS
SELECT
   -- Parent Element's _id (from 'elements' or 'elements$versions' in the unified Element view)
   (SELECT _id FROM Element WHERE source_table = 'elements' AND original_id = ec.elements_id) AS parent__id,
   -- Content Element's _id (from 'elements$content' in the unified Element view)
   (SELECT _id FROM Element WHERE source_table = 'elements$content' AND original_id = ec.id) AS content__id
FROM
   "elements$content" AS ec
WHERE
   ec.elements_id IS NOT NULL -- Only include if it has a valid parent link

UNION ALL

SELECT
   -- Parent Element's _id (from 'elements$versions' in the unified Element view)
   (SELECT _id FROM Element WHERE source_table = 'elements$versions' AND original_version_id = evc."elements$versions_versionId") AS parent__id,
   -- Content Element's _id (from 'elements$versions$content' in the unified Element view)
   (SELECT _id FROM Element WHERE source_table = 'elements$versions$content' AND original_id = evc.id) AS content__id
FROM
   "elements$versions$content" AS evc
WHERE
   evc."elements$versions_versionId" IS NOT NULL; -- Only include if it has a valid parent link
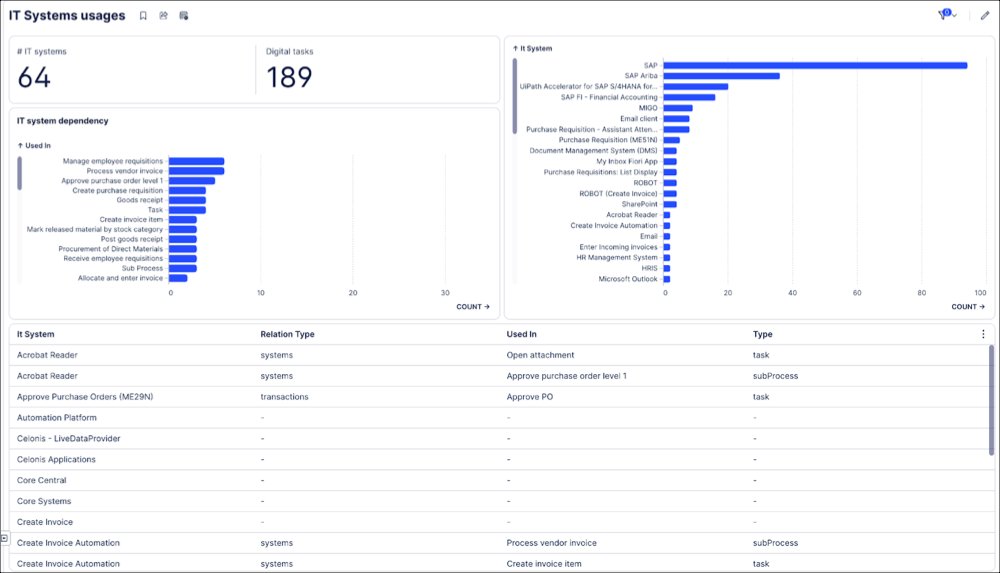
With the connection and transformation set up, you then are able to make use of the data within your Analytical tools. Here is an example of how it could look like using Celonis Views.