To push data to the Celonis Platform using the Standard Data Ingestion API, you'll need to either create a data pool or use an existing data pool. For more information about data pools, see: Creating and managing data pools.
The name of any file being pushed must be unique. If there are two files with the same name being pushed, only one file will be ingested.
With access to a data pool:
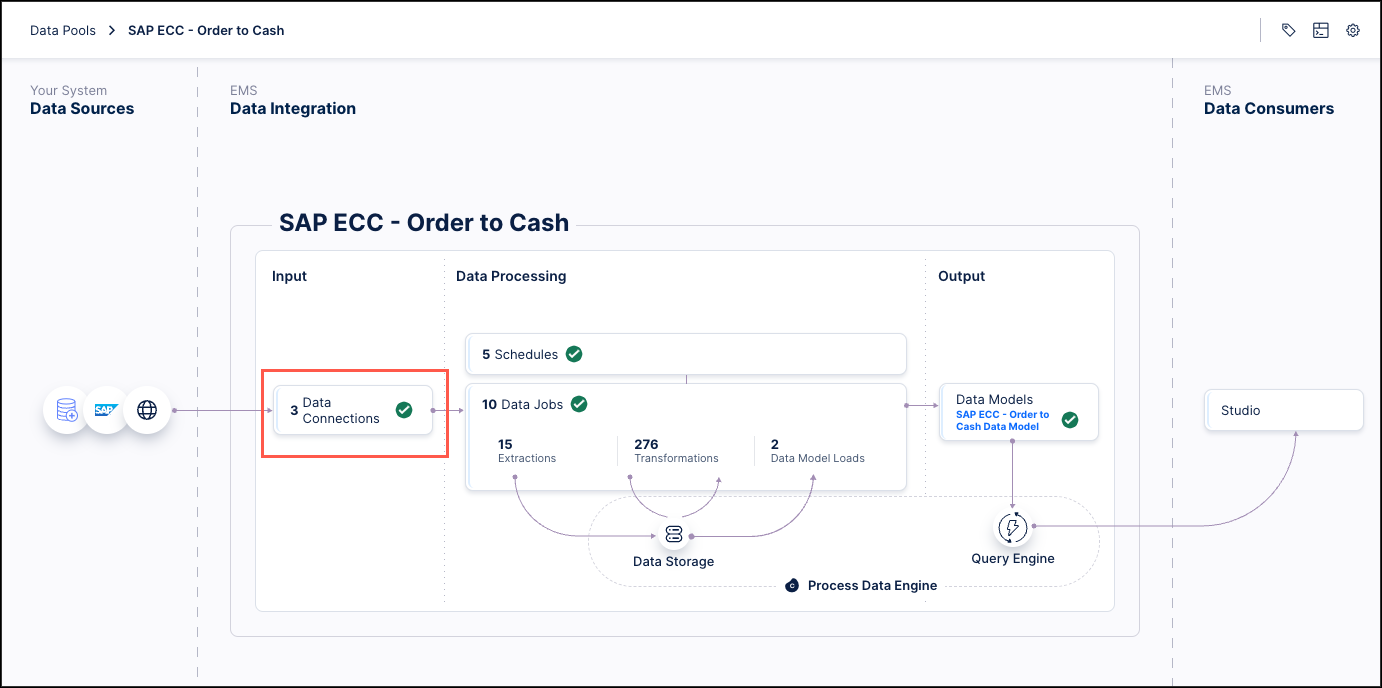
From your data pool diagram, click Data Connections.
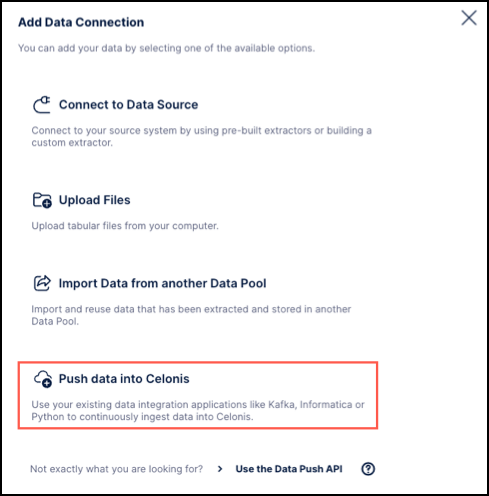
Click Add Data Connection and then select Push data into Celonis.
Define a connection name and the target table names you want to push data into.
When using multiple tables: Add these into the connection configuration. In the same step, define the data structure to use. There are two types:
Flat - Select this option if the data you're pushing is in a flat format. If you proceed with the Flat type, you also need to define:
- Primary key: This is used to properly handle delta loads and is similar to defining a primary key in a regular extraction. This primary key must also be part of the pushed data every time or the delivery will fail.
- Age column: This column is used to guarantee that the most recent version of a record (identified by its primary key) is stored in Celonis. Usually this is a date column and if a record with a value smaller than the existing value gets inserted, the update will not be applied. However, values with equal or larger values will be applied accordingly.
For a case where you are pushing data into one target table called order, which has order_id as primary key and a timestamp reflecting when the record was created (created_at), your final configuration would look like this: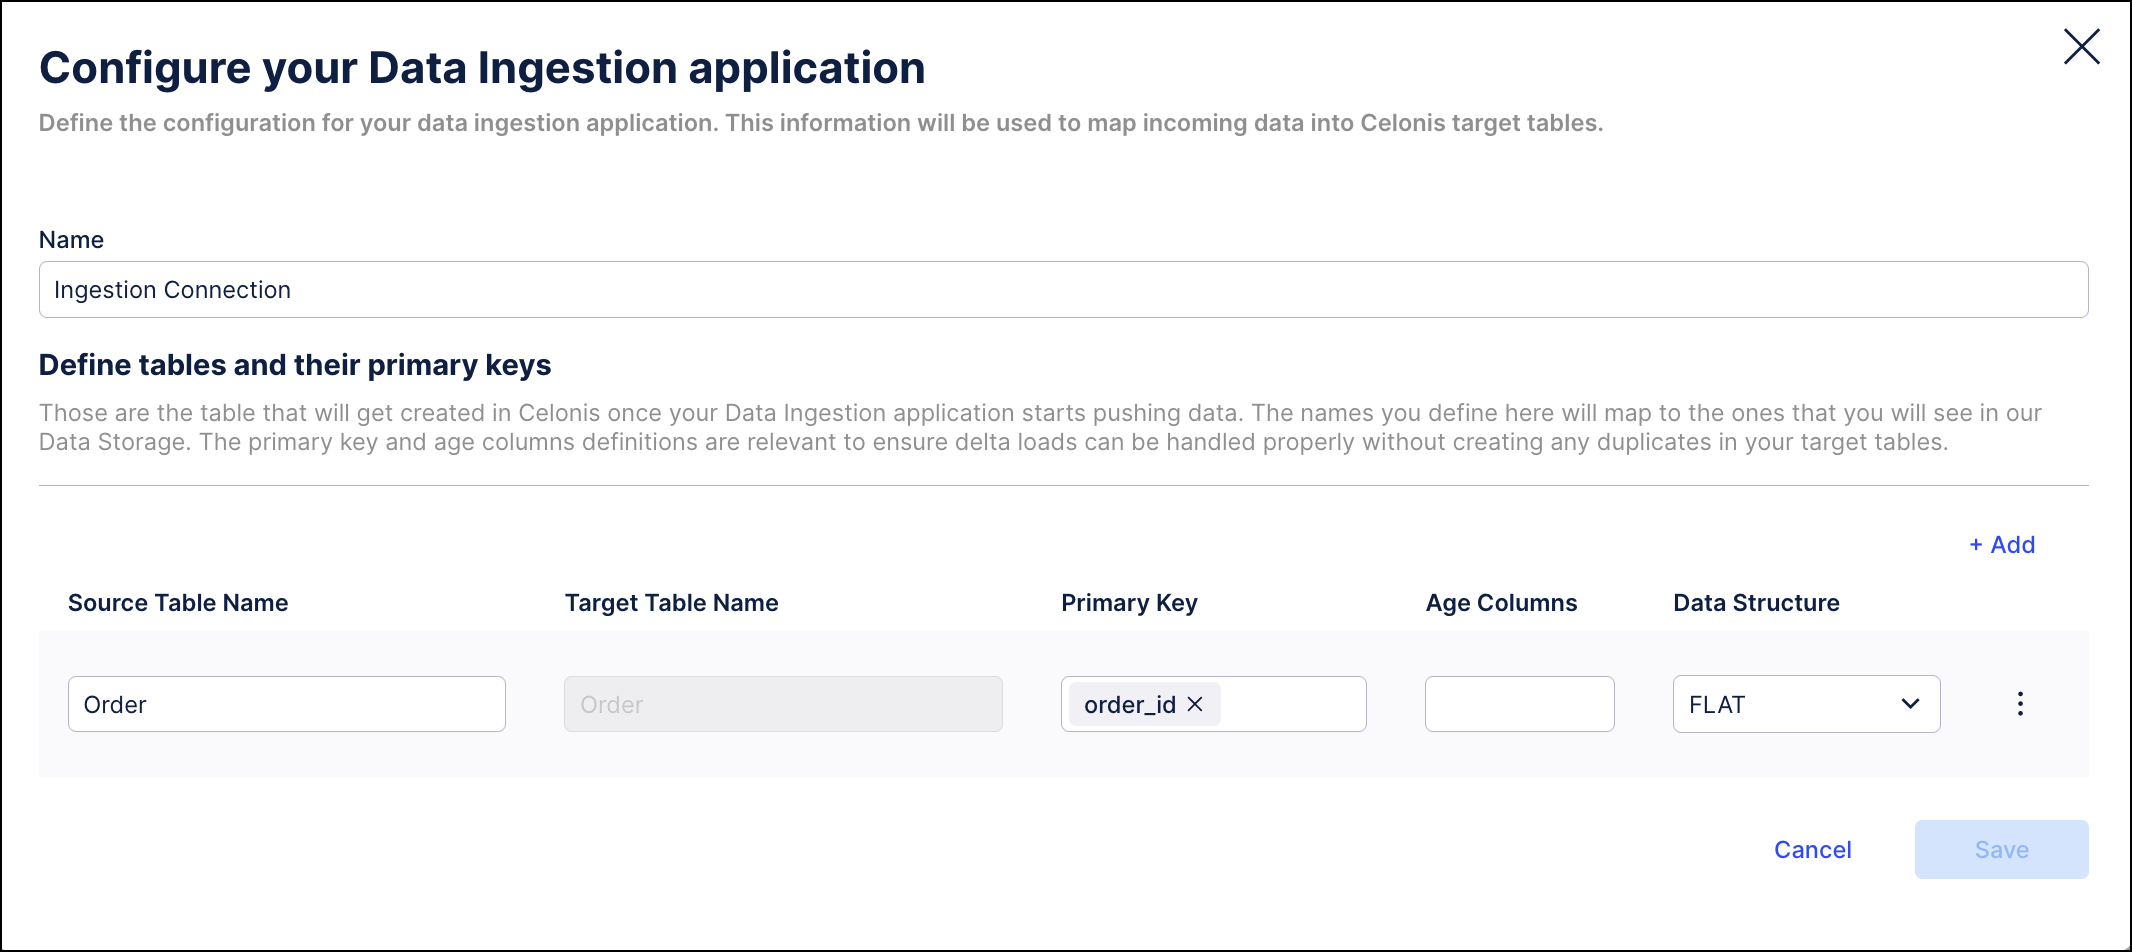
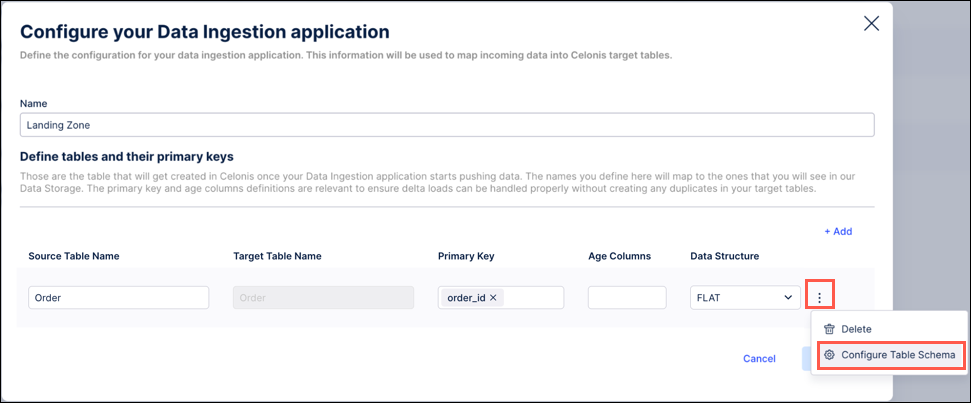
Nested - This option needs to be selected when the data you want to push is in a nested format (e.g. JSON). In this case, you need to configure the table schema so that the nested tables can be constructed and the appropriate primary keys can be retrieved. To do this, click Options > Configure Table Schema:
To define the schema, we suggest using one exemplary record from your data and copy and paste it into the window on the left side.
In this example, we are using an order with some information such as id, date, price info, and one nested table with regards to shipments. Once the example record gets pasted into the left side of the window, we automatically derive the target table structure with the corresponding column names on the right side of the window:
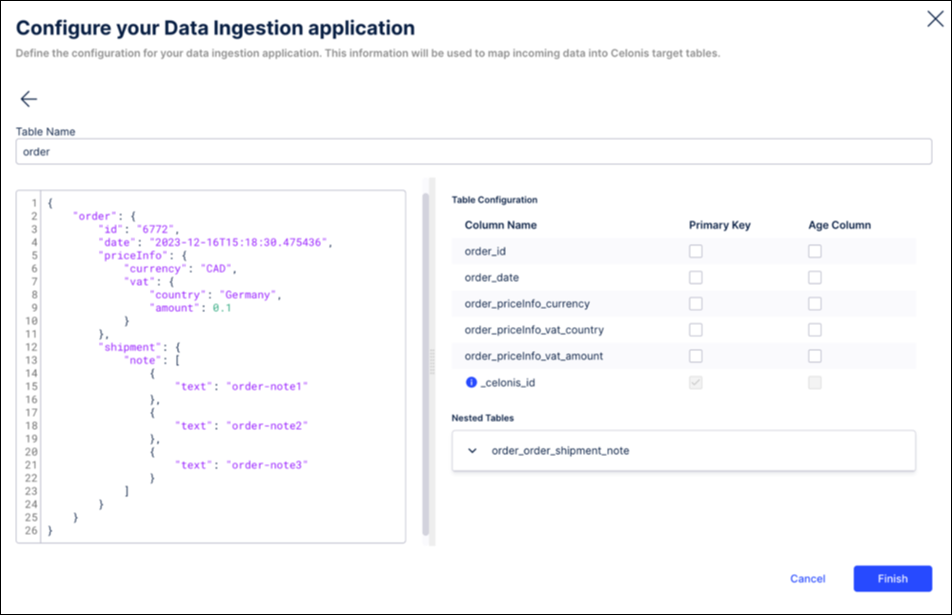
By default, a column is added called _celonis_id (indicated by a tooltip) in case no primary key has been configured. However, in this example we define:
- The order_id to be the primary key by selecting the relevant checkbox. Once selected, two things will happen automatically:
- The autogenerated _celonis_id will disappear from the configuration.
- The order_id gets created as a foreign key on the child table so users can join these two tables later on.
- The order_date column as the age column.
As a result, the configuration will look like this:
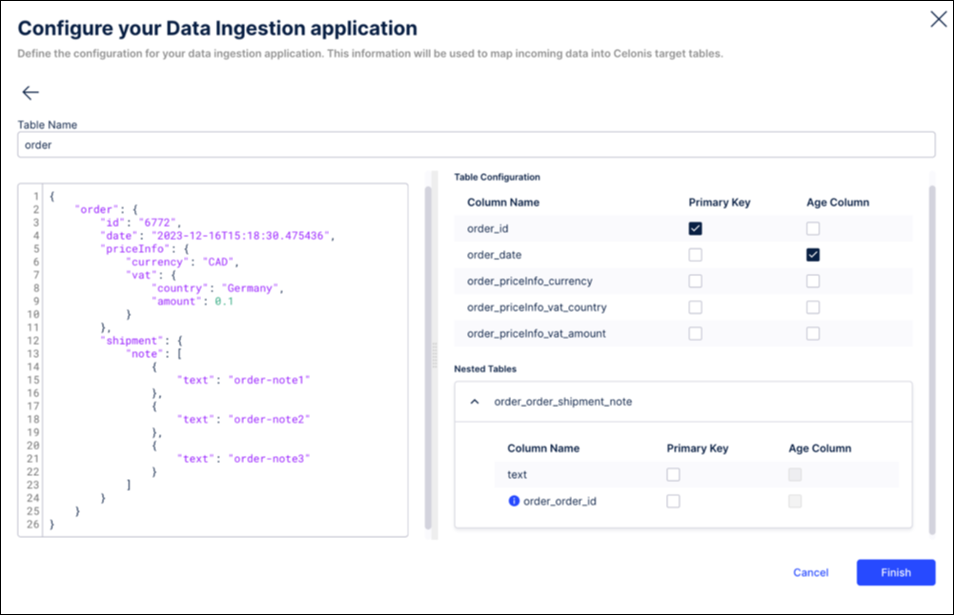
If you click Finish, the Primary Key and Age column defined as part of the schema configuration will automatically be applied.
- The order_id to be the primary key by selecting the relevant checkbox. Once selected, two things will happen automatically:
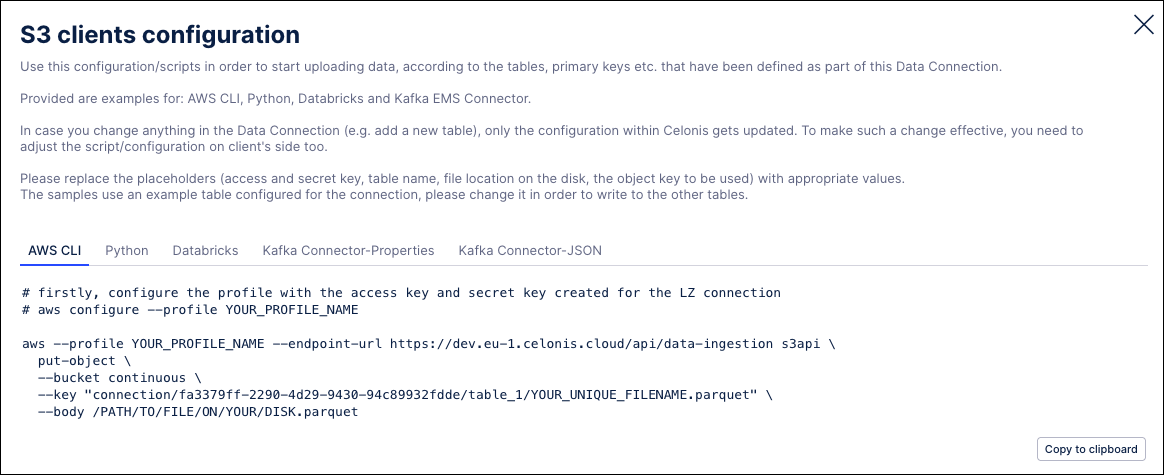
Save the configuration and note down the Access Key and Access Secret. Those are the credentials that you will need for the API request to authenticate to Celonis when pushing data.
For script examples, refer to the client-specific instructions on the S3 clients configuration screen by going to Data Connection > S3 Client Configuration.