The Celonis Agent Tools (MCP) Asset provides a growing set of ready-to-use tools that AI agents can use to search for relevant information, get real-time process context, trigger actions in external systems, and write back decisions to Celonis. Delivered securely via the Model Context Protocol (MCP), this toolkit makes it easy to build sophisticated agents that leverage Process Intelligence.
Before you begin, ensure you have the following:
- A Celonis account with access to Agent Tools (MCP) Asset enabled for your team
- An MCP-compatible client to connect to the MCP Server (e.g., Claude Desktop, Postman, etc.)
- Administrative access to your Celonis team to create OAuth clients or Application Keys
Before setting up authentication, you need to create and publish an Agent Tools (MCP) Asset in Celonis:
Log in to your Celonis account with access to Agent Tools (MCP) Asset
Navigate to Studio and select your desired package
Create an Agent Tools (MCP) Asset
- Create a new asset with the type "MCP Server"
Configure the MCP Server
- Add the desired tools to your MCP Server
- Configure the tools according to your needs
Publish the Asset
- Once configured, publish the asset
- After publishing, a link for the published asset will appear at the top of the asset
- This link is your MCP Server URL (format:
https://[team].[realm].celonis.cloud/studio-copilot/api/v1/mcp-servers/mcp/[mcp-server-id]) - Save this URL - you will need it when connecting to the MCP Server from your client
A correctly setup MCP Server would look like this: 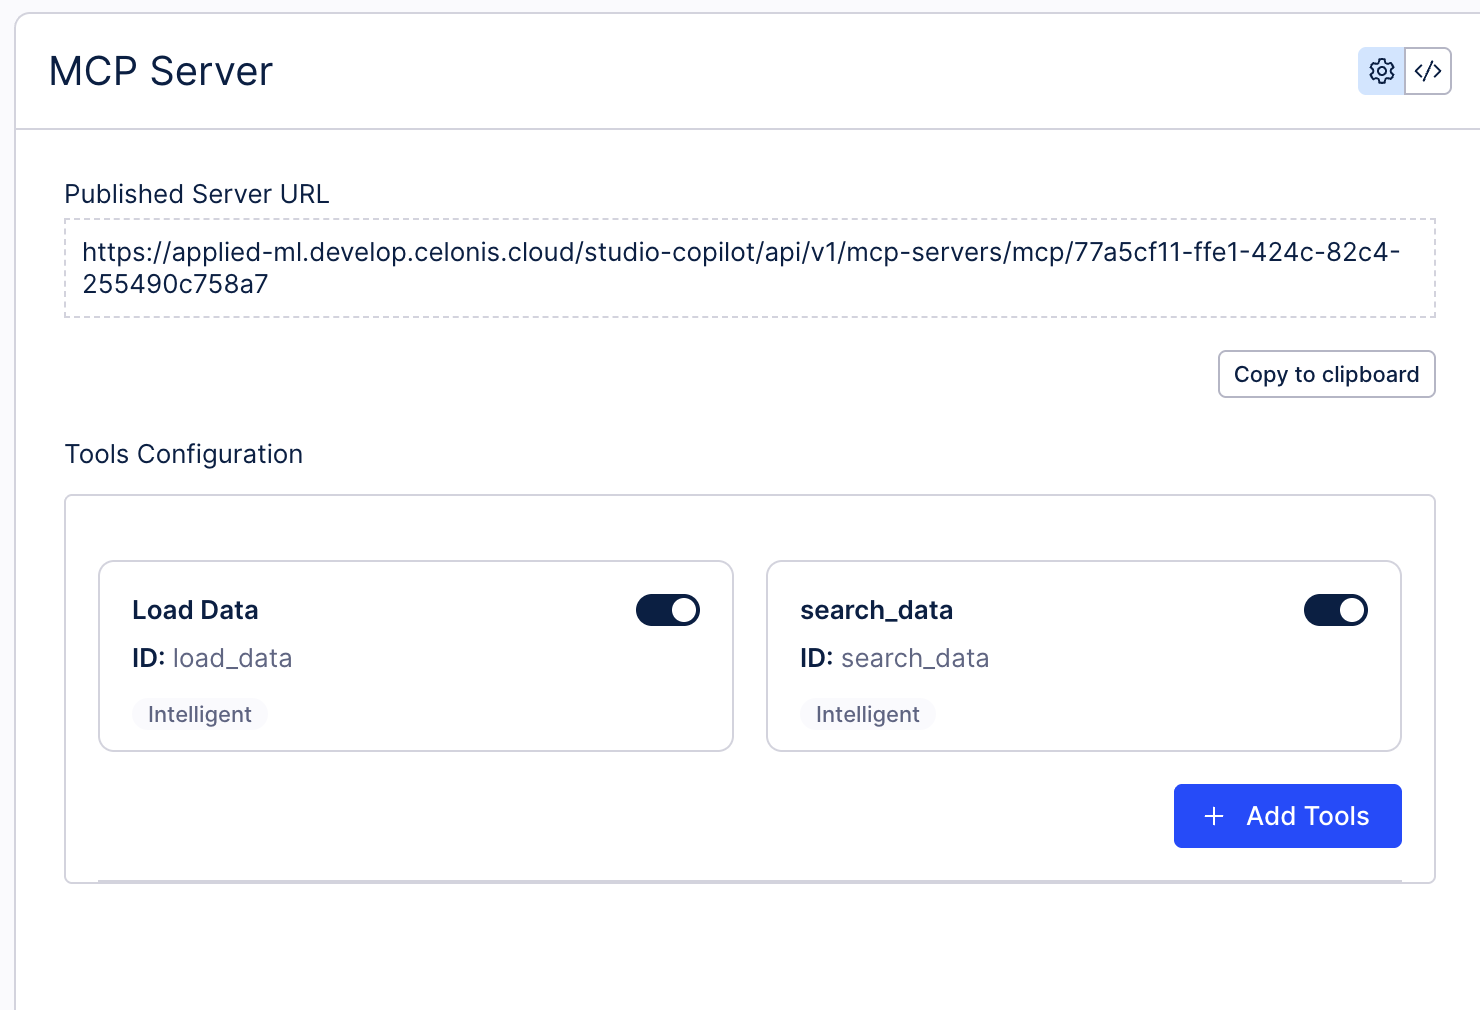
The Celonis MCP Server supports two authentication methods. Choose the option that best fits your use case:
OAuth 2.0 is the recommended authentication method for production use. The MCP Server supports two OAuth grant types:
- Client Credentials: Best for server-to-server communication and automated workflows
- Authorization Code: Best for applications that act on behalf of users
Create an OAuth Client in your Celonis platform with the following requirements:
- Grant Type:
Client Credentials - Authentication Method:
Client Secretwith one or both of the following:- Client secret basic
- Client secret post
- Scope:
mcp-asset.tools:execute(under the MCP scope group)
- Grant Type:
Authorization Code - Redirect URI: Configure with your application's redirect URI (e.g.,
https://oauth.pstmn.io/v1/callbackwith Postman) - Authentication Method:
Client Secretwith one or both of the following:- Client secret basic
- Client secret post
- Refresh Token: Enable if supported by your client
- Scope:
mcp-asset.tools:execute(under the MCP scope group)
After creating the OAuth Client, save your Client ID and Client Secret - you will need these to connect to the MCP Server.
Application Keys provide a simpler authentication method but with fewer security features compared to OAuth. This method is suitable for testing and development purposes.
Create an Application Key in your Celonis platform. After creation, save your Application Key - you will need this to connect to the MCP Server.
After creating your OAuth Client or Application Key, you must grant it permissions to access your Agent Tools (MCP) Asset. Grant the 'use' permission to your Agent Tools (MCP) Asset for the OAuth Client or Application Key you created.
This step is crucial to allow your client to access the MCP Server. Without proper permissions, connection attempts will fail.
Now you're ready to connect to your Agent Tools (MCP) Asset. The authentication details are the same for both MCP protocol and OpenAPI tool calling:
You'll need the following information to connect:
- MCP Server URL: The URL you saved in Step 1 (format:
https://[team].[realm].celonis.cloud/studio-copilot/api/v1/mcp-servers/mcp/[mcp-server-id]) - Team URL: Your Celonis team URL (e.g.,
https://[team].[realm].celonis.cloud)
- Access Token URL:
https://[team].[realm].celonis.cloud/oauth2/token - Client ID: Your OAuth Client ID
- Client Secret: Your OAuth Client Secret
- Scope:
mcp-asset.tools:execute - Grant Type:
client_credentials
- Grant Type:
Authorization Code (With PKCE) - Redirect URI: The redirect URI you configured when creating the OAuth Client
- Access Token URL:
https://[team].[realm].celonis.cloud/oauth2/token - Authorization URL:
https://[team].[realm].celonis.cloud/oauth2/authorize - Client ID: Your OAuth Client ID
- Client Secret: Your OAuth Client Secret
- Code Challenge Method: SHA-256
- Scope:
mcp-asset.tools:execute
- Authentication Type: Bearer [your-application-key]
Use MCP protocol when your client supports JSON-RPC tool discovery and execution directly (for example, an MCP Request in Postman).
- Go to File > New and select "MCP Request".
- Select HTTP as the protocol to connect to the MCP Server (STDIO is used for local development).
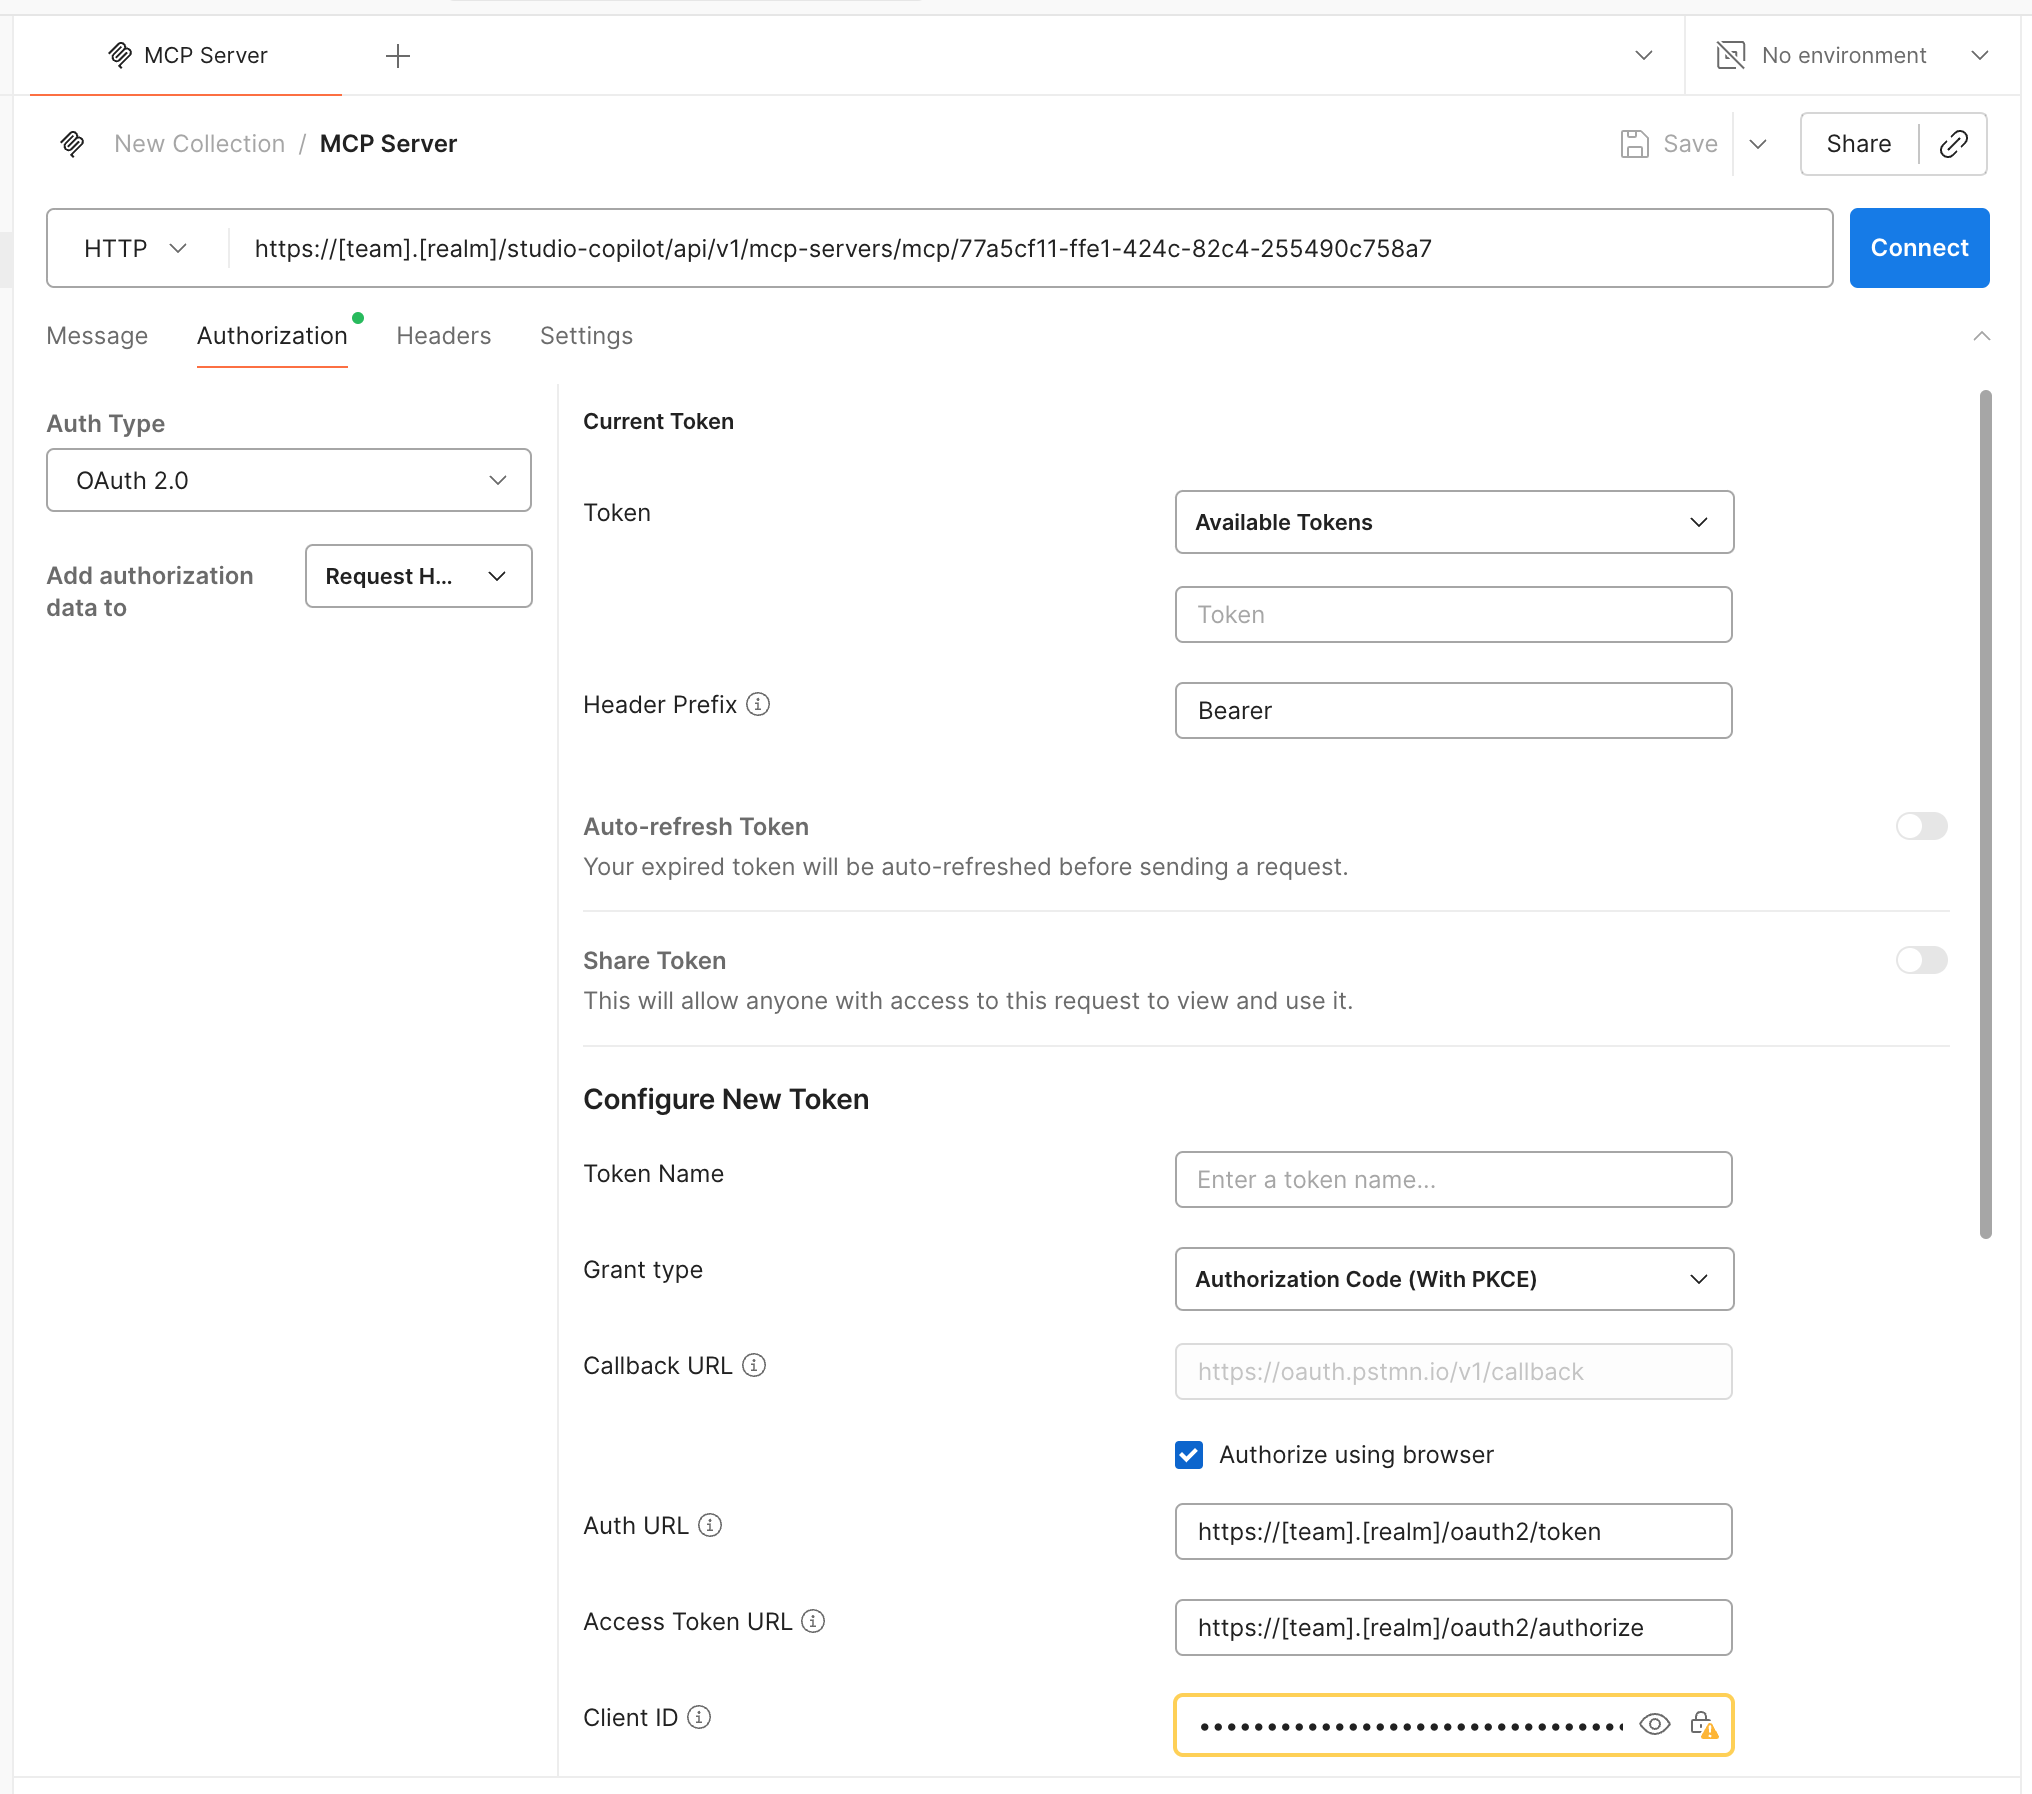
- On the Authorization tab, select OAuth 2.0 and fill in the details as mentioned above.
- Redirect URI:
https://oauth.pstmn.io/v1/callback
- Redirect URI:
A correctly configured MCP Request would look like this:
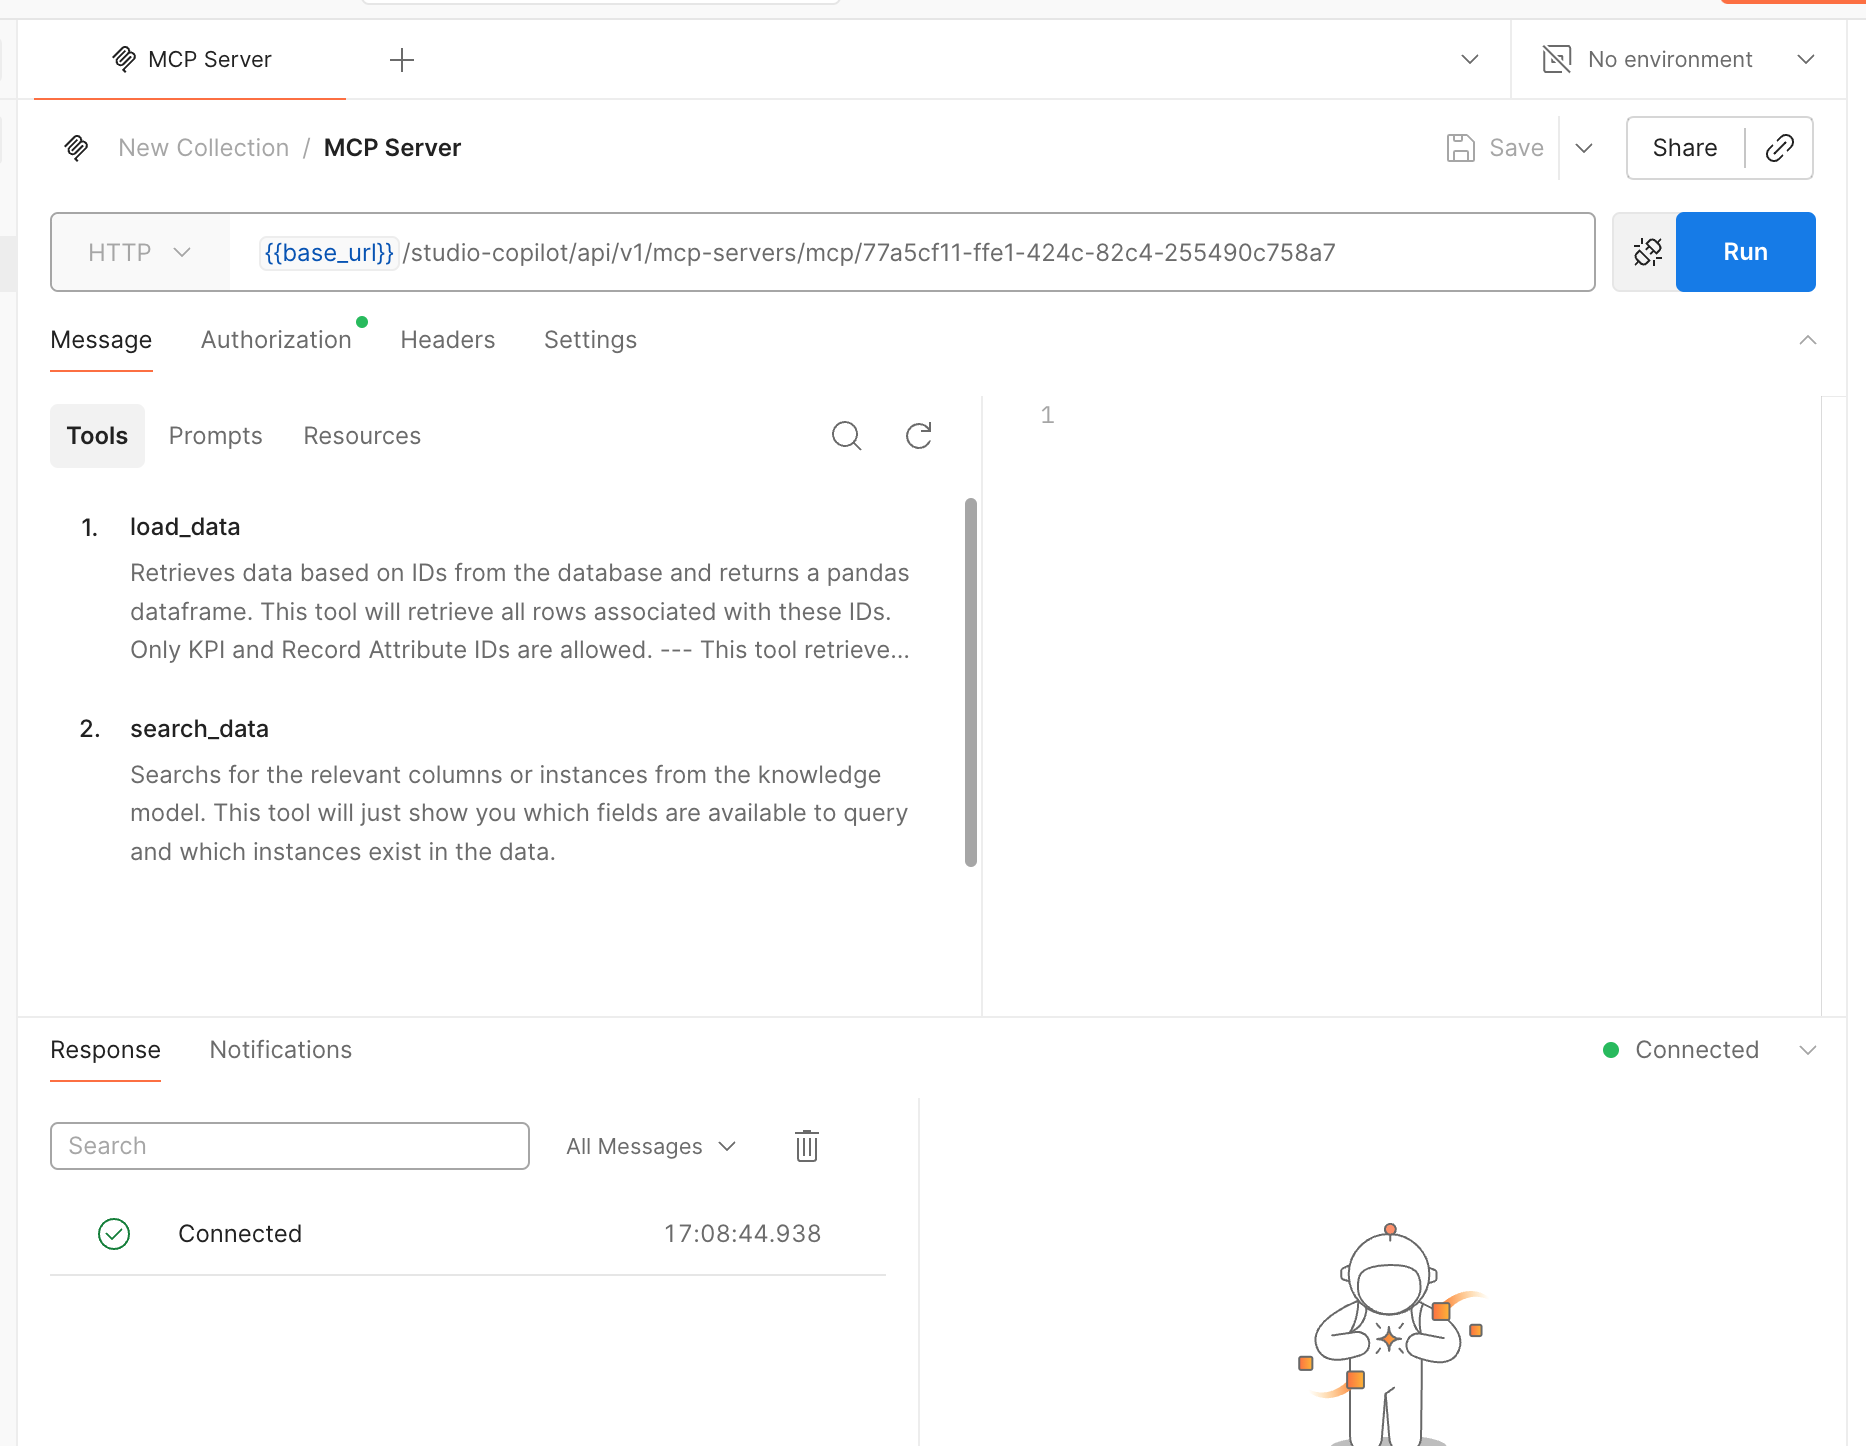
- Once you obtain the access token, use it to connect to the MCP Server by clicking the Connect button. You should now see a list of the tools you configured in your Agent Tools (MCP) Asset:
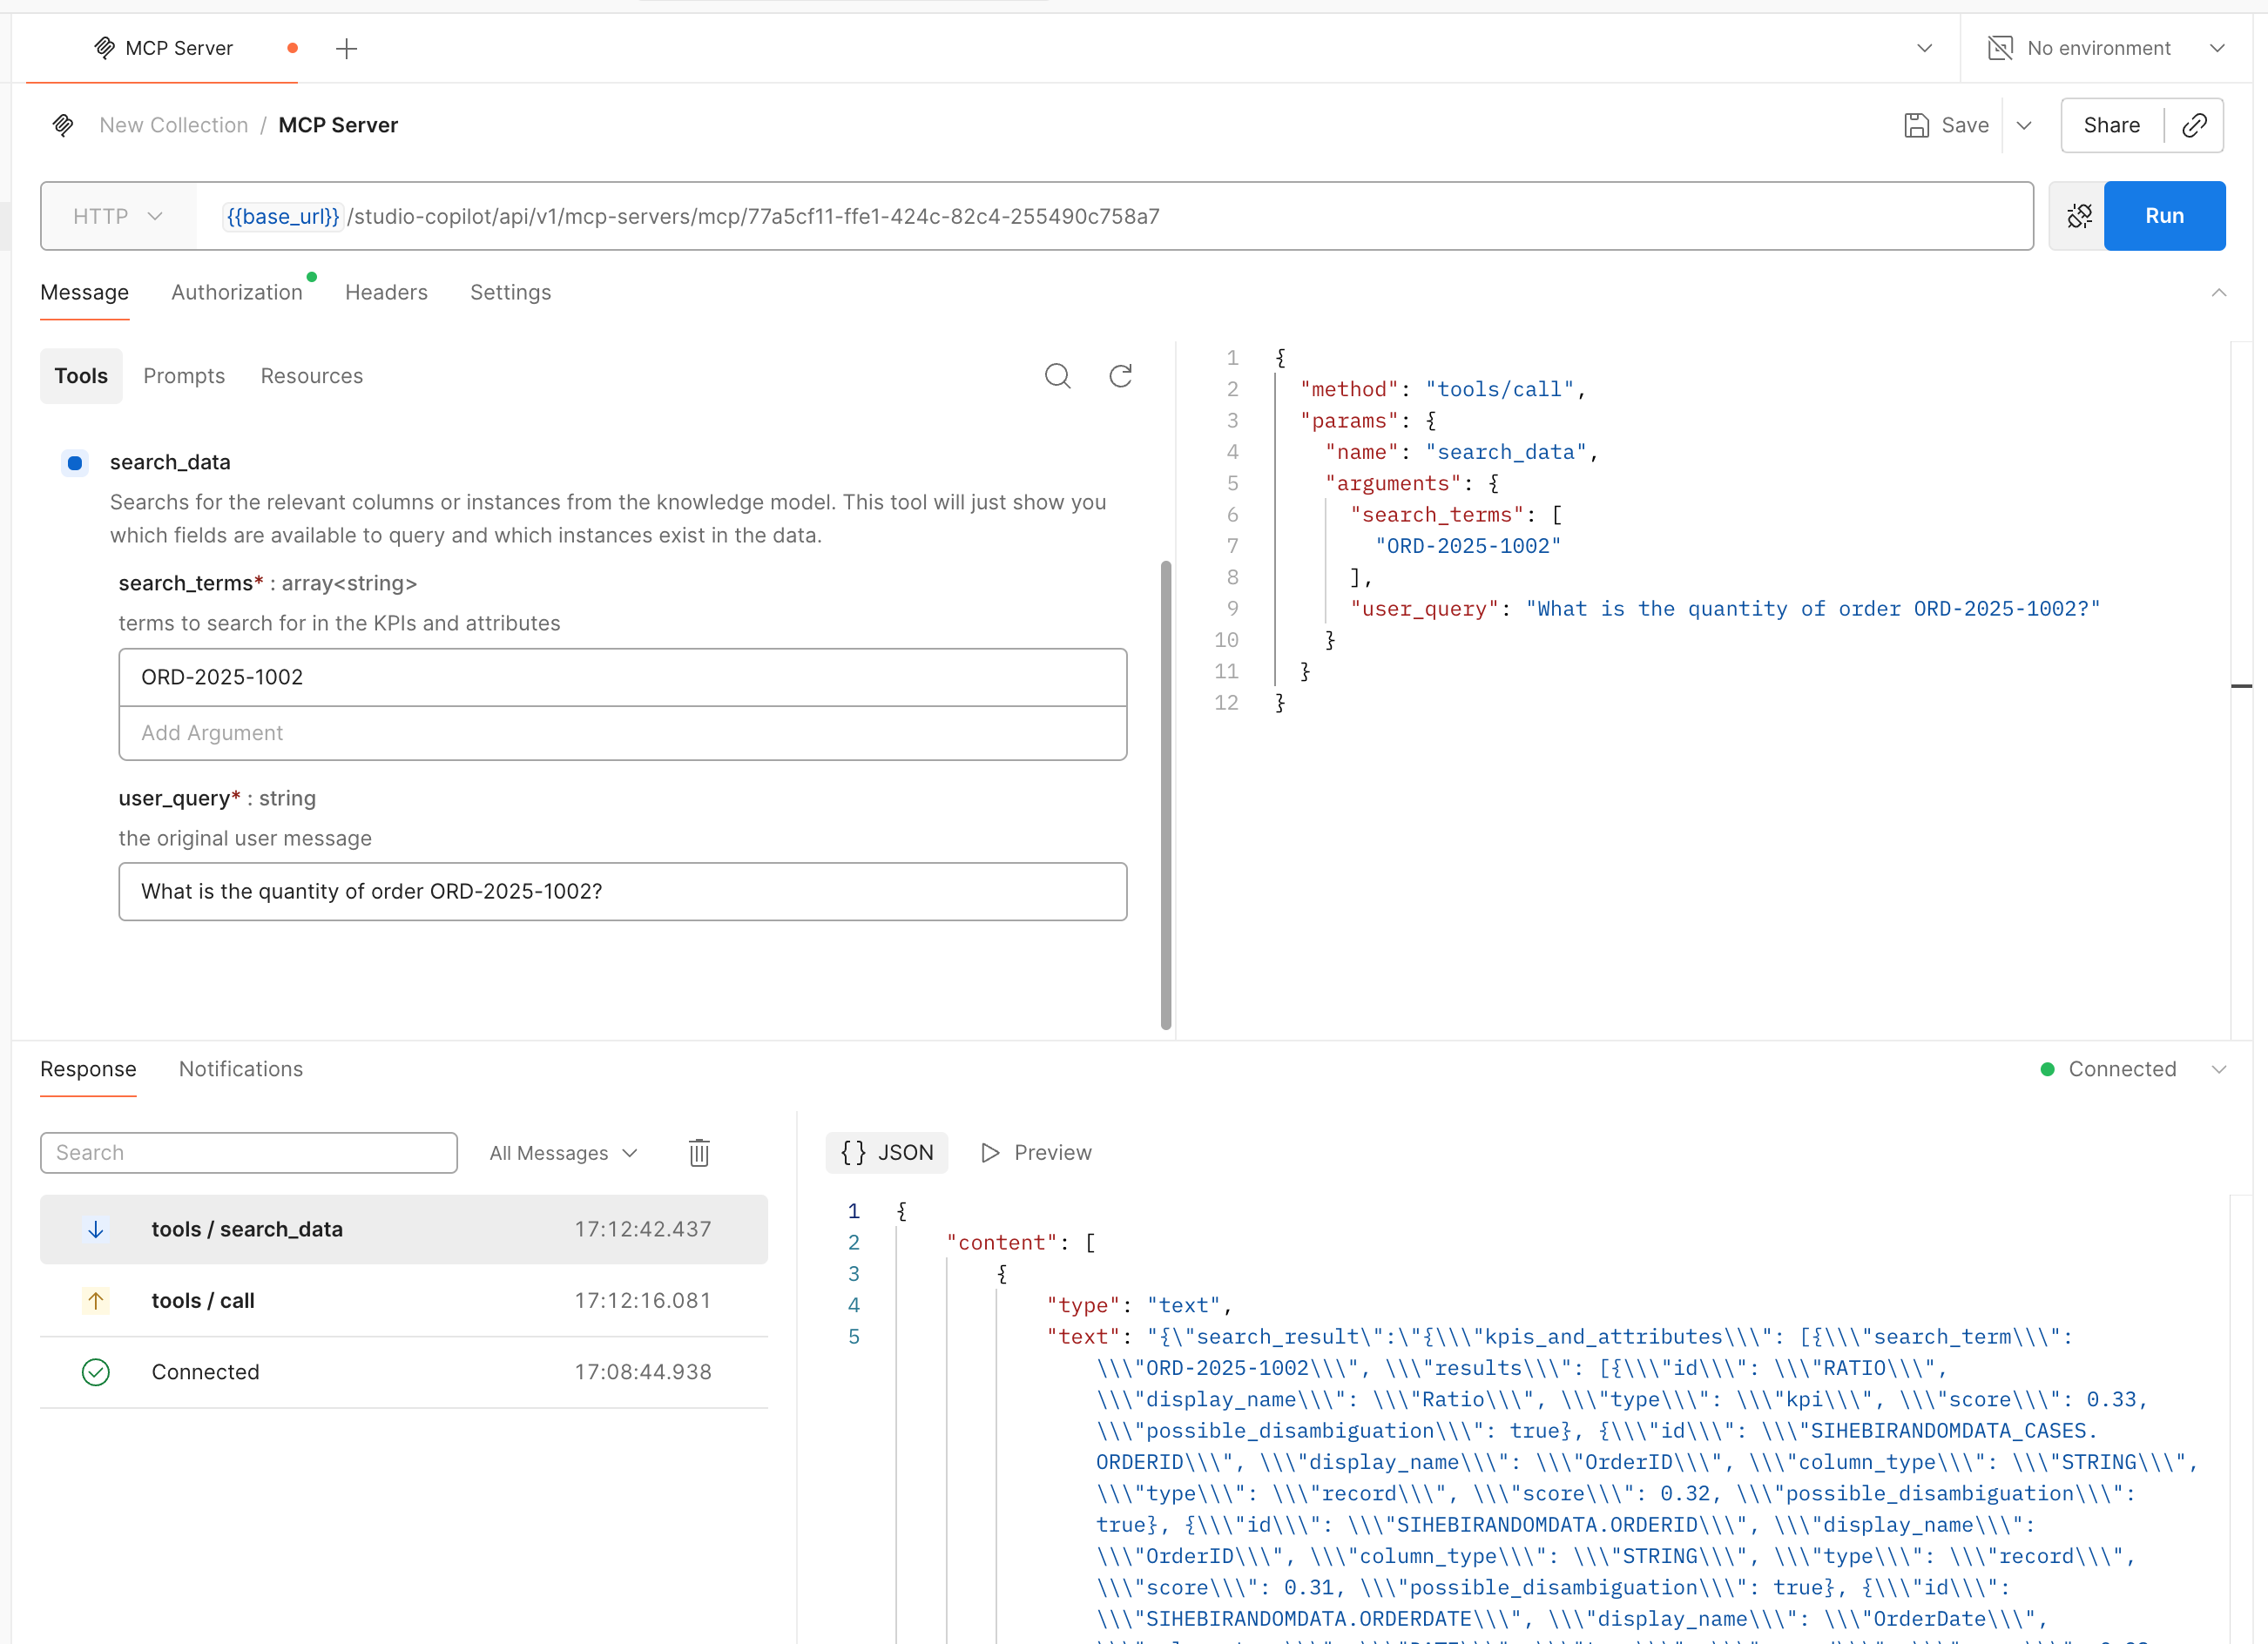
- Fill in the required parameters for the tool you want to execute and click the Run button. You should see the result of the tool execution:
See the full protocol reference in MCP Protocol Tool Calling API Reference.
Use OpenAPI tool calling when your client or platform expects an OpenAPI contract and executes tools as HTTP endpoints.
- Open your configured Agent Tools (MCP) Asset in Celonis Studio and click Use OpenAPI instead to open the generated OpenAPI specification.
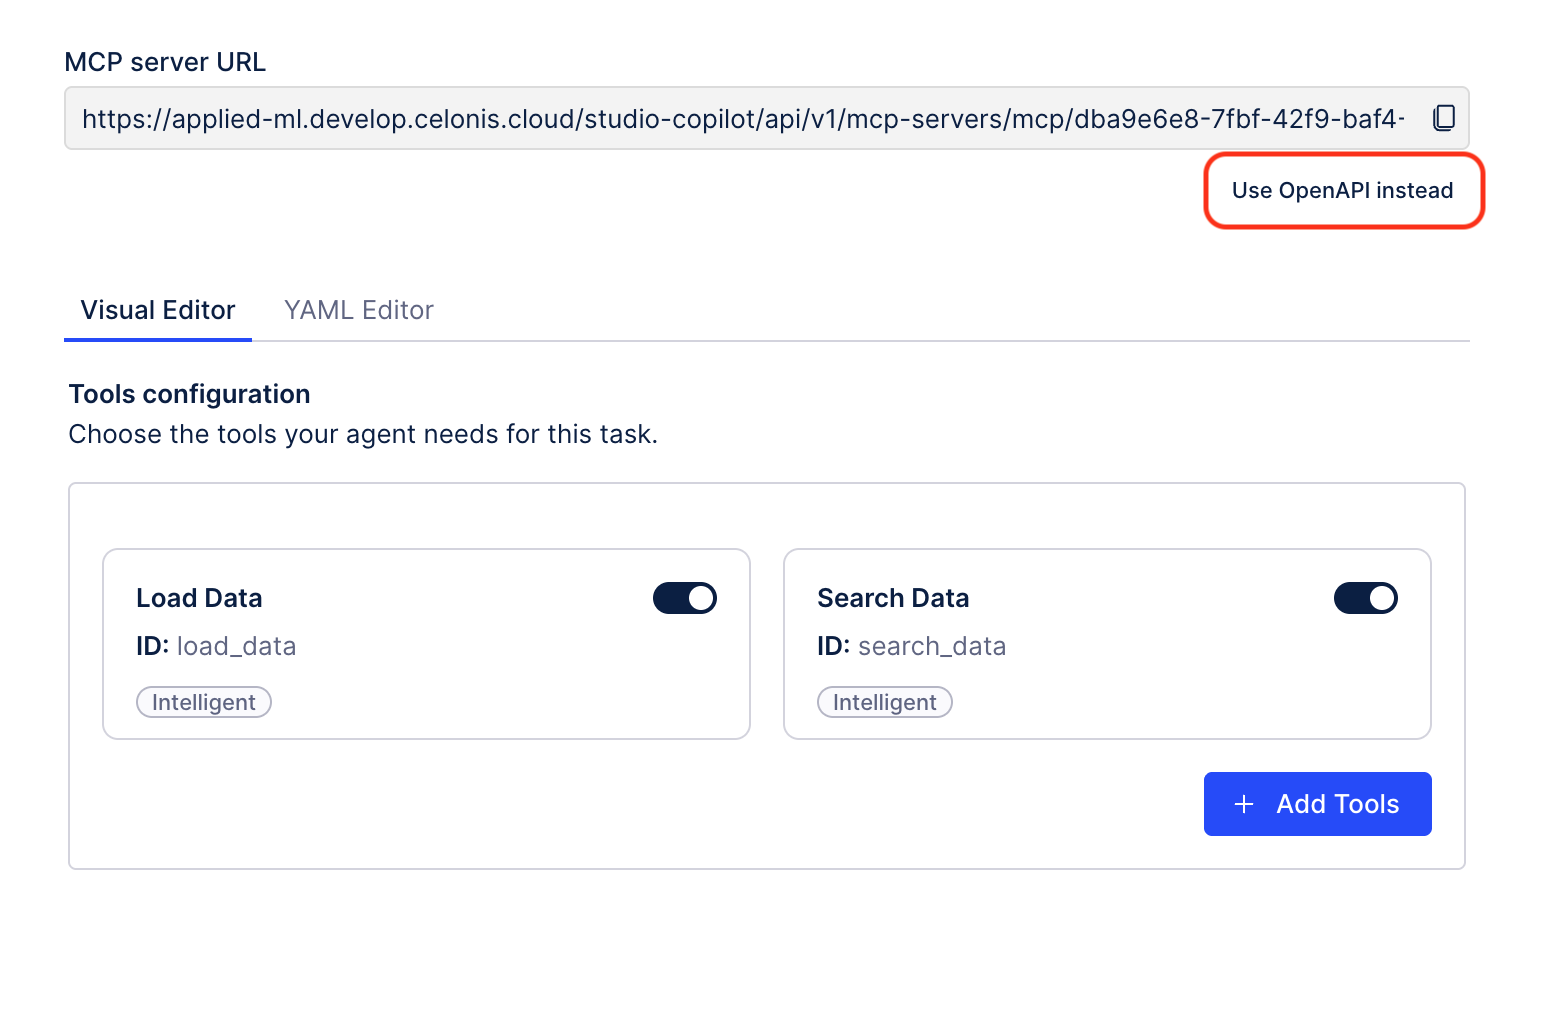
- Review and copy the generated OpenAPI specification.
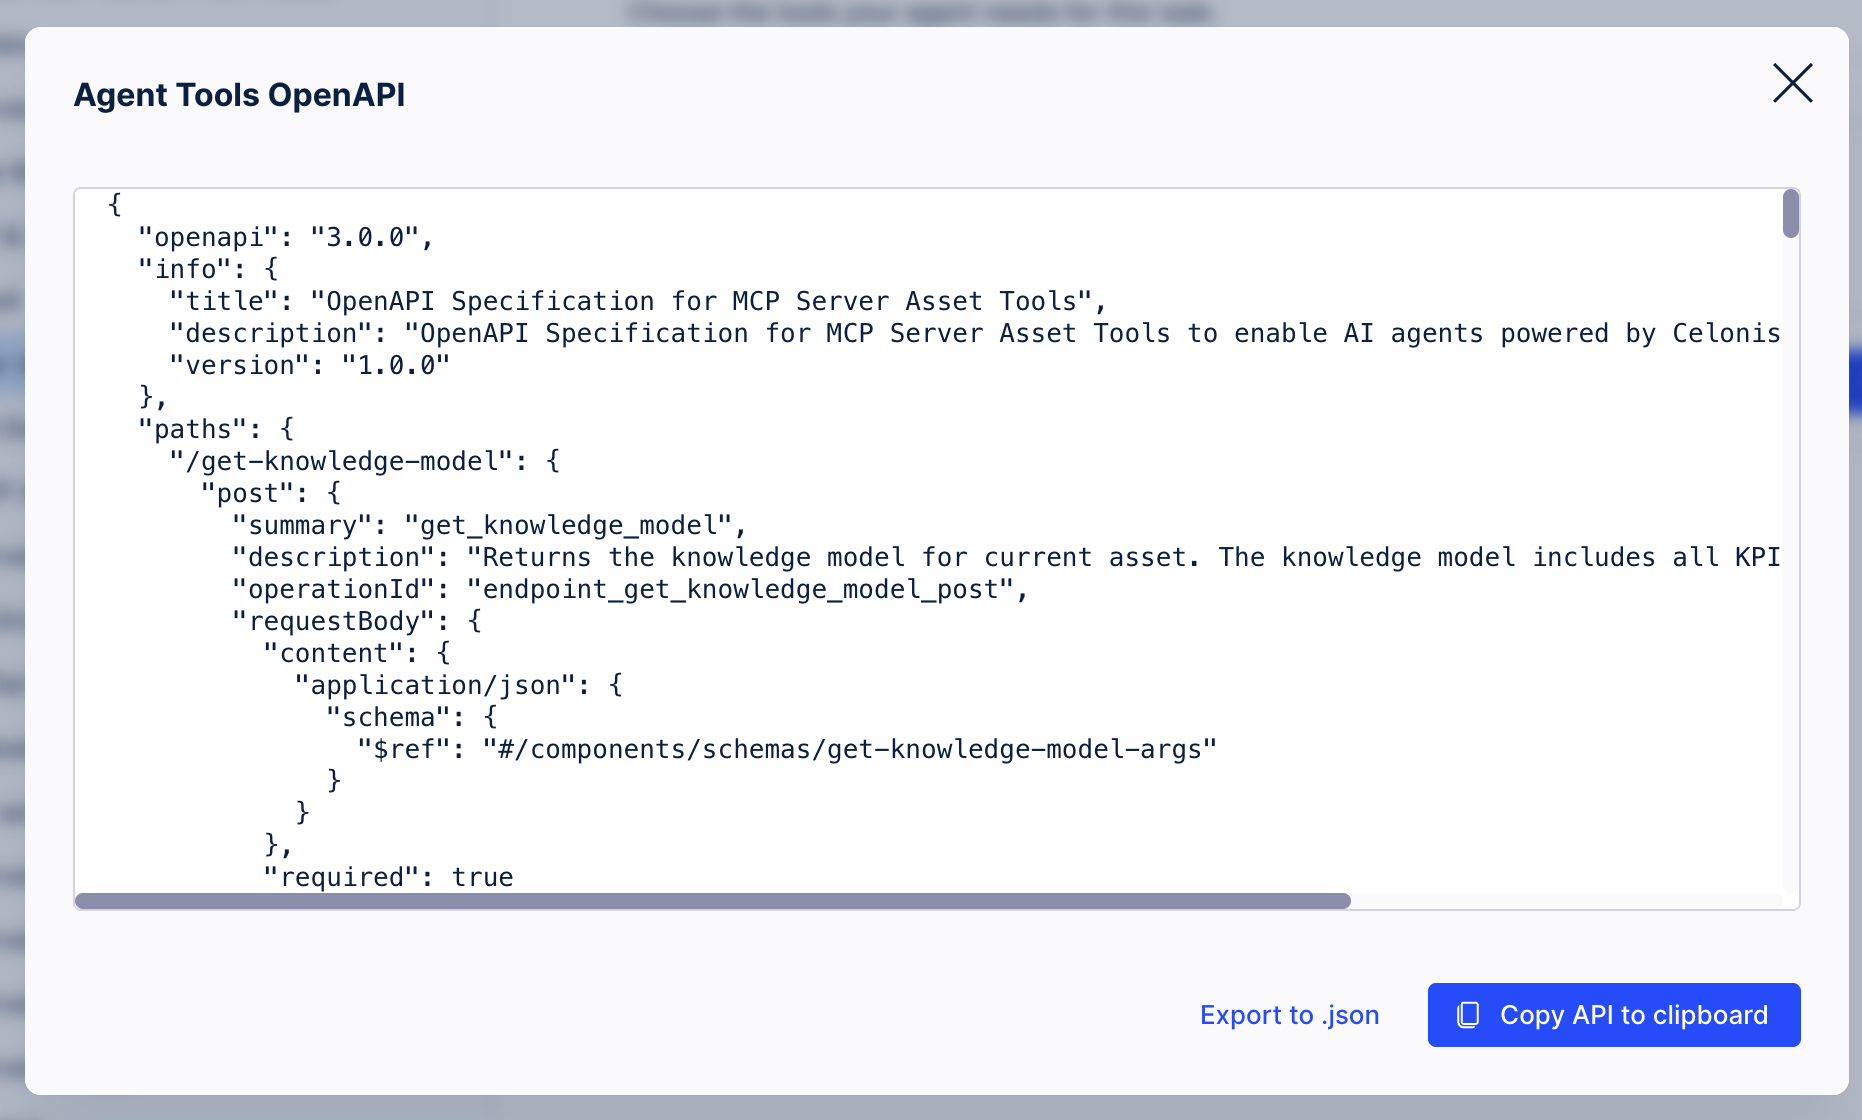
- Import the specification into your client (for example Postman), use the same OAuth 2.0 or Application Key authentication described above, and call the tool endpoint from the OpenAPI spec.
- OpenAPI tool calling format:
https://[team].[realm].celonis.cloud/studio-copilot/api/v1/mcp-servers/mcp/[mcp-server-id]/tool-api/[tool-id]
- OpenAPI tool calling format:

See the full OpenAPI contract in OpenAPI Tool Calling API Reference.
If you encounter any issues, please check the following:
- Ensure your Agent Tools (MCP) Asset is published and the MCP Server URL is correct.
- Verify that your OAuth Client or Application Key has been granted the 'use' permission for your Agent Tools (MCP) Asset.
- Confirm your OAuth Client has the correct scope (
mcp-asset.tools:execute). - For OAuth 2.0, verify that the token URL and authorization URL match your team's realm.
- Check that your Client ID and Client Secret are correct and haven't been regenerated.