After reading all the documentation, you might want to give AI Agent API a try. For that, we have prepared a demo environment that anyone can access. Authentication is required, but any token that you pass should work, so no need to get a User or Application key in advance.
To show how this environment works, we will use Postman, but you can use any other REST client.
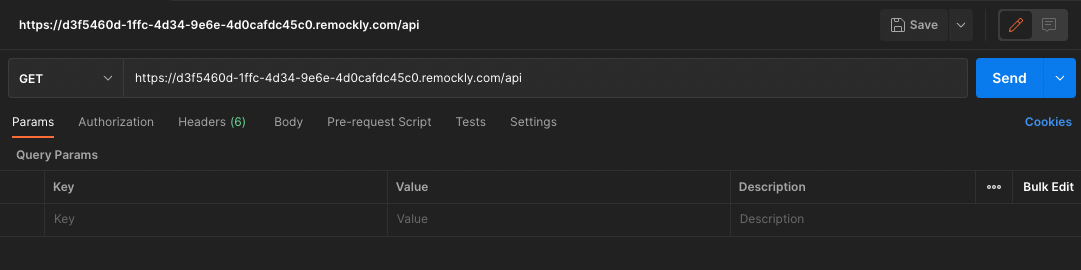
The URL where this API can be located is: https://16abf815-424c-413e-b92d-6c6f8fc633cd.remockly.com/intelligence/api. Keep in mind that for real production environments, the URL typically ends with /intelligence/api and not /api.
Start by creating a new HTTP Request in Postman (File > New > HTTP Request). Make sure that you have selected a GET operation and paste the URL for the API next to it: https://16abf815-424c-413e-b92d-6c6f8fc633cd.remockly.com/intelligence/api.
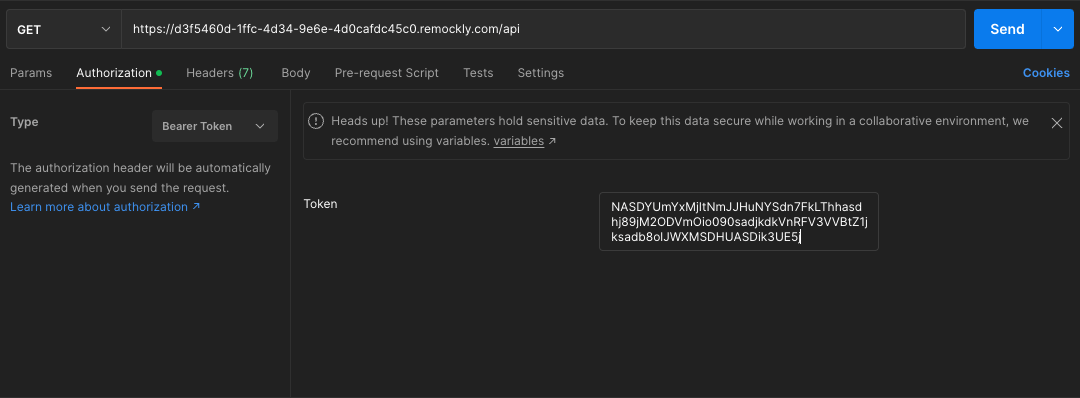
Let's say our User API Key is NASDYUmYxMjItNmJJHuNYSdn7FkLThhasdhj89jM2ODVmOio090sadjkdkVnRFV3VVBtZ1jksadb8olJWXMSDHUASDik3UE5j. Go to Postman and use this key for the Authentication header. Click on Authorization and select Bearer Token for the Type. For the token, paste the above key.
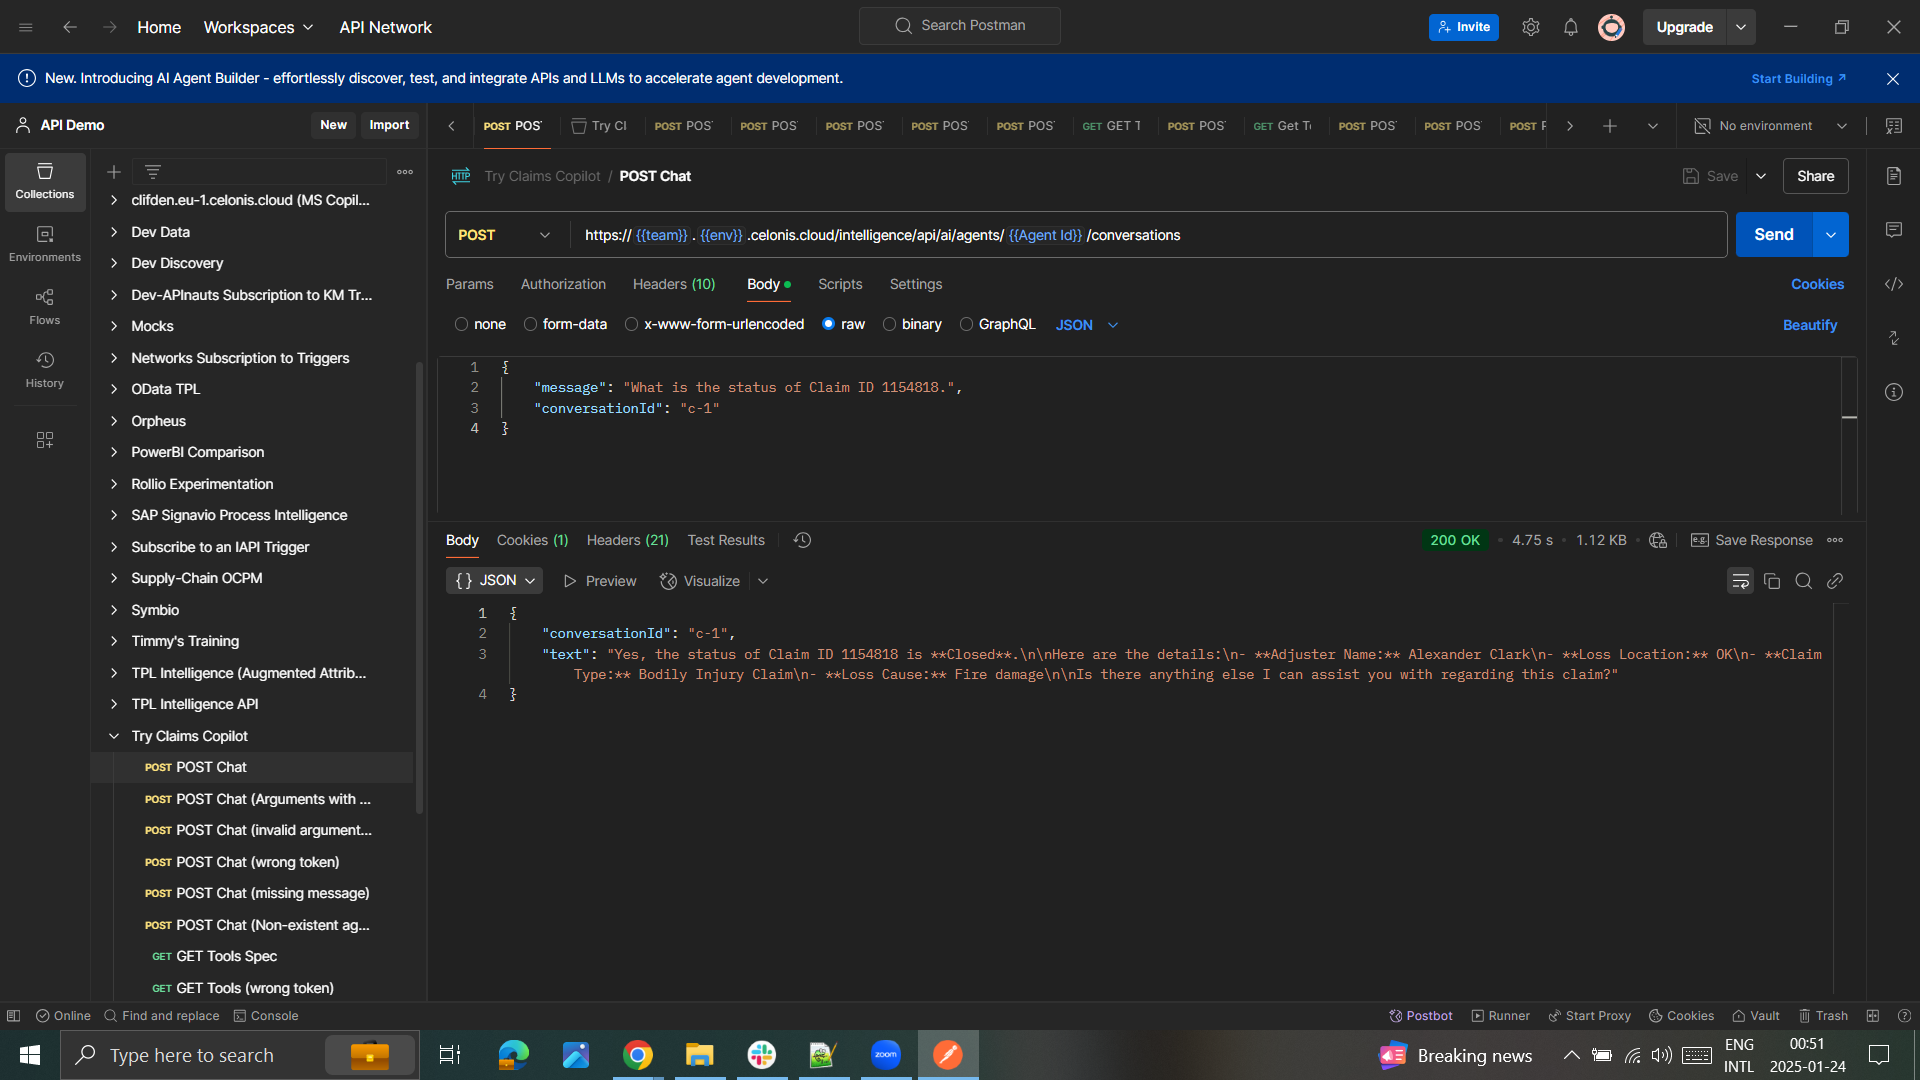
Imagine you want to chat with a Celonis Agent to get some information. This is possible by adding /conversations to the URL of the Celonis Agent.