This topic walks you through integrating your Celonis MCP Server with Microsoft Copilot Studio. This integration enables your AI agents to leverage your Celonis tools and capabilities from Microsoft Copilot Studio.
Before you begin, ensure you have:
- Completed the Getting Started guide and set up your MCP Server in Celonis
- Access to Microsoft Copilot Studio
- Administrative permissions to create OAuth clients in your Celonis Platform
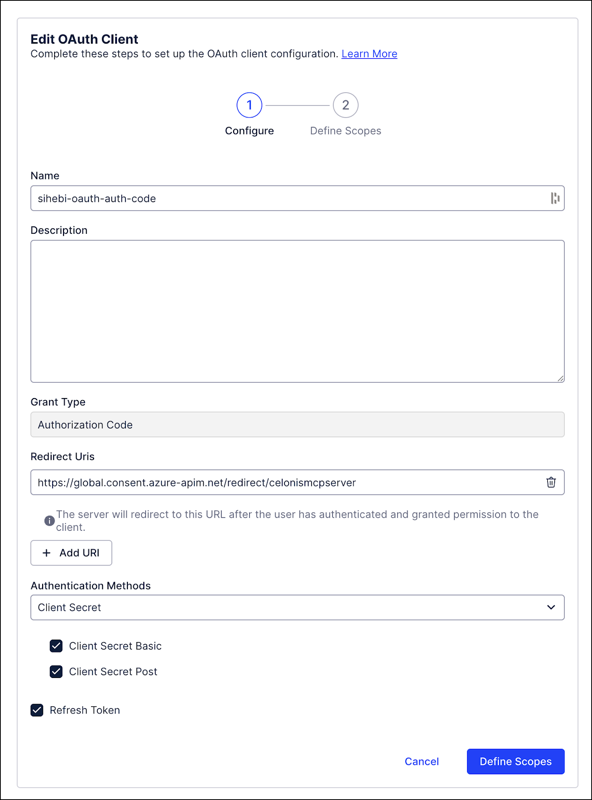
Create an OAuth client in your Celonis Platform with the following configuration:
- Grant Type:
Authorization Code - Redirect URI:
https://global.consent.azure-apim.net/redirect/celonismcpserver - Authentication Method:
Client Secretwith both:- Client secret basic
- Client secret post
- Refresh Token: Enabled
- Scope:
mcp-asset.tools:execute(on the subsequent screen under the “MCP” scope group)
Your configuration should look like this:
- Click the Define Scopes button.
- Scroll down to the mcp group and expand it.
- Then select the
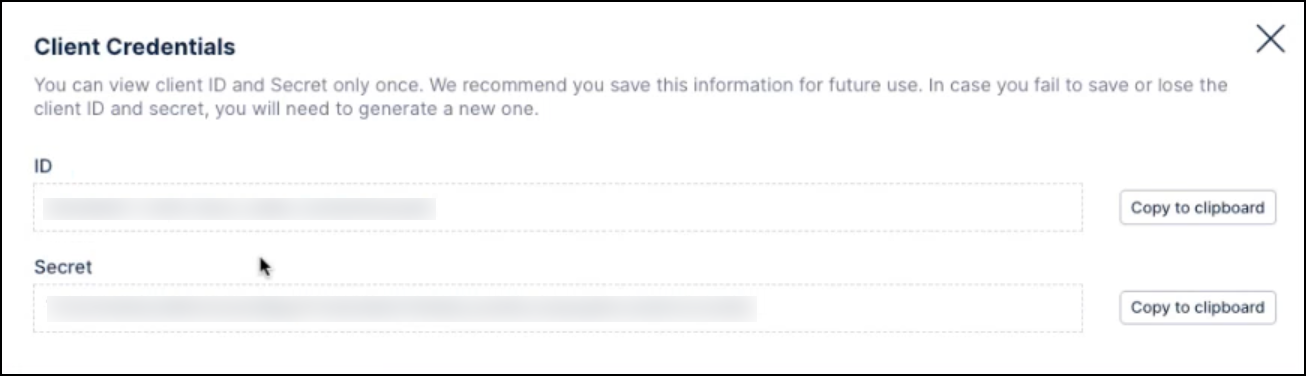
mcp-asset.tools:executeoption and click Create. - In the Client Credentials window, use the Copy to clipboard buttons to save your Client ID and Client Secret as you'll need them in Step 3.
When configuring a connection using the Authorization Code, the client ID and client secret will inherit permissions from the user. If additional permissions need to be assigned, go to the package you are using in Studio and follow these instructions.
Any references to third-party products or services do not constitute Celonis Product Documentation nor do they create any contractual obligations. This material is for informational purposes only and is subject to change without notice.
Celonis does not warrant the availability, accuracy, reliability, completeness, or usefulness of any information regarding the subject of third-party services or systems.
- Open Microsoft Copilot Studio and navigate to your Agent Configuration.
- Click on the Tools tab.
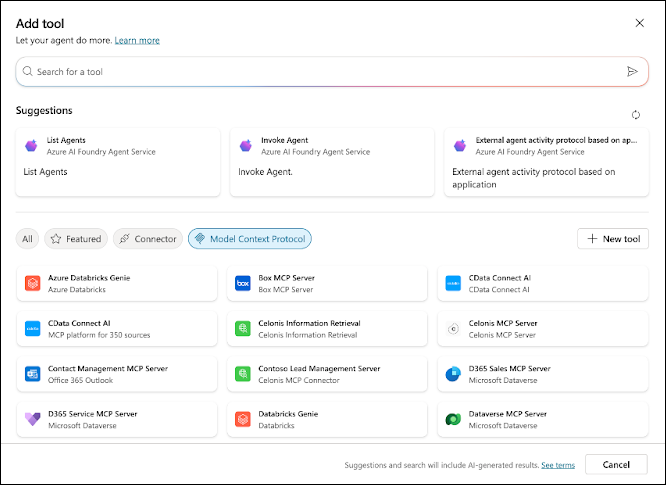
- Click the Add a Tool button.
- On the Add tool screen, search for "Celonis MCP Server" or find it under the Model Context Protocol tab.
- Follow these instructions from the Microsoft Copilot Studio help center to finish adding the tool.
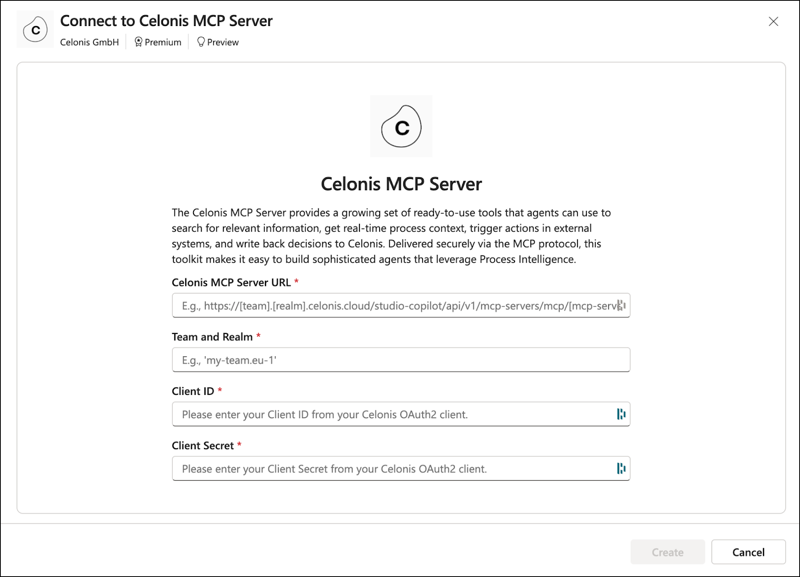
After selecting the Celonis MCP Server tool, you'll be prompted to create a new connection. Provide the following details:
- Celonis MCP Server URL: Your MCP Server URL from the Getting Started guide:
https://[team].[realm].celonis.cloud/studio-copilot/api/v1/mcp-servers/mcp/[mcp-server-id] - Team and Realm: Your Celonis instance details. Example:
test.eu-1fromhttps://**test.eu-1**.celonis.cloud - Client ID: The OAuth Client ID from Step 1.
- Client Secret: The OAuth Client Secret from Step 1.
Click Create. Once the connection is established, click Add and Configure.
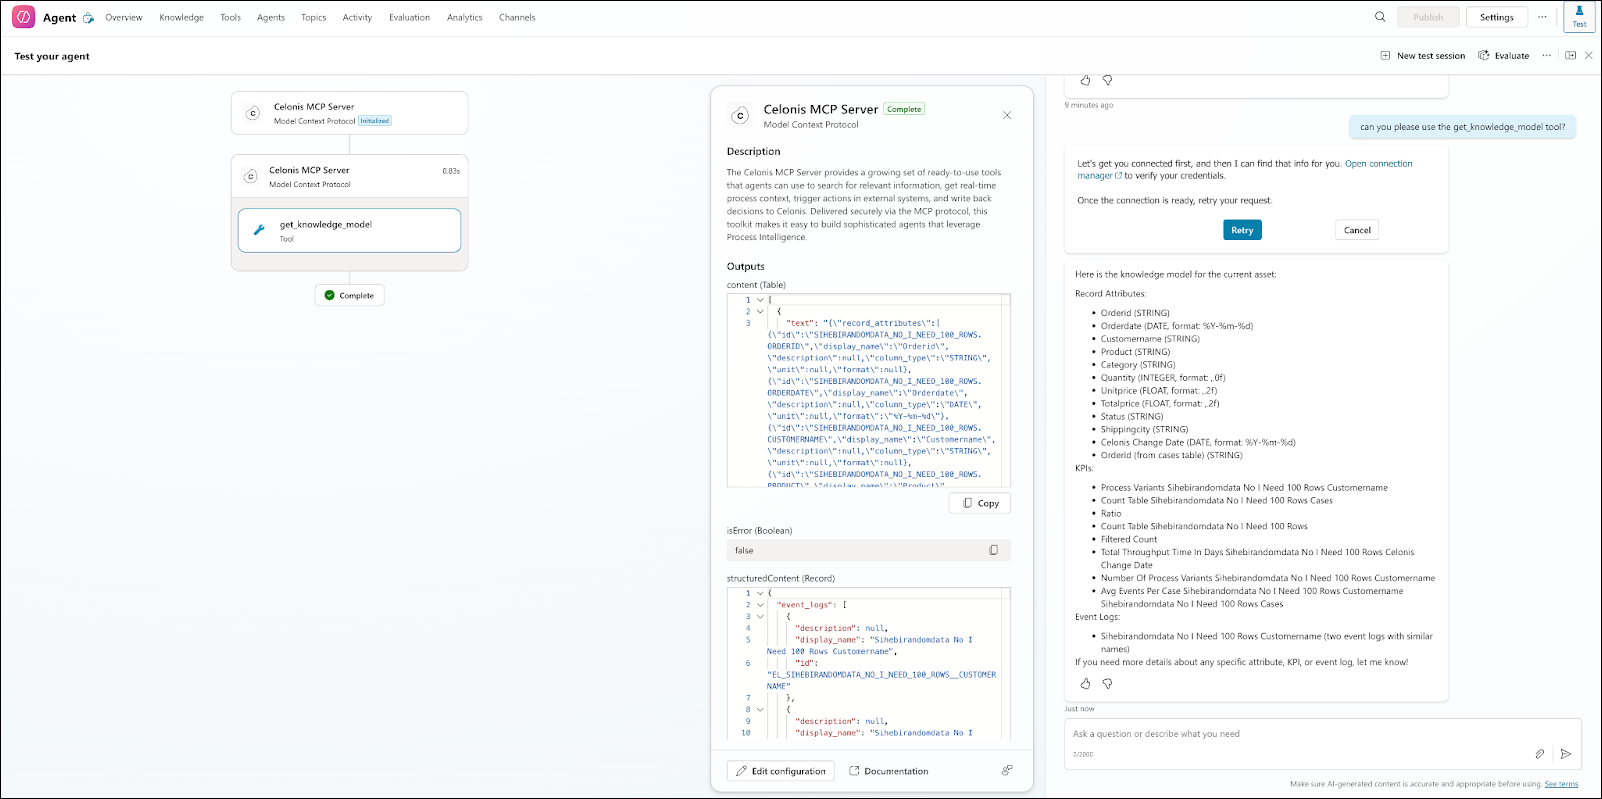
Once the connection is successfully configured, you'll see all the tools available from your Agent Tools (MCP) Asset:

The first time you use the tool, you'll need to activate the connection:
Send your first message to the agent to trigger the connection.
Click the link in the agent’s response to navigate to the Connection Manager.
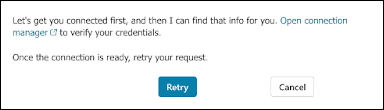
In the Connection Manager, find the connection you just created and click Connect to authorize your new connection.
You're now ready to test your agent with the Celonis tools you've configured.
If you encounter issues:
- Verify your OAuth client configuration matches the requirements exactly.
- Ensure the redirect URI is correctly set in your Celonis OAuth client:
https://global.consent.azure-apim.net/redirect/celonismcpserver - Check that your MCP Server URL is correct and your asset is published.
- Confirm the
mcp-asset.tools:executescope is enabled. - Verify that your OAuth Client has the use package permission assigned for your Agent Tools (MCP) Asset.