This topic walks you through integrating your Celonis MCP Server with Claude (web, CLI). This integration enables your AI agents to leverage your Celonis tools and capabilities from Claude.
Celonis provides a pre-registered OAuth client for Claude, so you do not need to create your own OAuth client in the Celonis Platform. Instead, you only need to deploy your Agent Tools asset, add it as a connector in Claude, and then sign in.
Before you begin, ensure you have:
- Completed the Getting Started guide and set up your Agent Tools Asset (MCP Server) in Celonis.
- Your MCP Server URL, in
https://[team].[realm].celonis.cloud/studio-copilot/api/v1/mcp-servers/mcp/[mcp-server-id]format. - A published Agent Tools (MCP) asset and the use package permission assigned to the package containing it.
- A Claude account. Custom connectors are available on the Free, Pro, Max, Team and Enterprise plans. Free accounts are limited to one custom connector.
- For Team and Enterprise plans: if you want the connector to be available to everyone, an Owner needs to add it once by going to Organization settings > Connectors. Individual members will still need to authorize it with their own Celonis account.
You need two values:
- MCP Server URL: Copied from the Getting Started guide. It looks similar to
https://[team].[realm].celonis.cloud/studio-copilot/api/v1/mcp-servers/mcp/[mcp-server-id], where[mcp-server-id]is the ID of your Agent Tools (MCP) Asset. Example:https://test.eu-1.celonis.cloud/studio-copilot/api/v1/mcp-servers/mcp/3f2b1c9e-7d4a-4f1b-9c8e-2a5d6b7c8e9f - Client ID:
claude_mcp_server_asset_oauth_1p
There is no client secret. The Celonis client for Claude is a public OAuth client that uses PKCE, so you can leave the secret field empty.
The connection authorizes using the Authorization Code grant, so it inherits the permissions of the Celonis user who signs in. If a user needs additional permissions, go to the package you are using in Studio and follow these instructions.
Any references to third-party products or services do not constitute Celonis product documentation nor do they create any contractual obligations. This material is for informational purposes only and is subject to change without notice.
Celonis does not guarantee the availability, accuracy, reliability, completeness, or usefulness of any information regarding the subject of third-party services or systems.
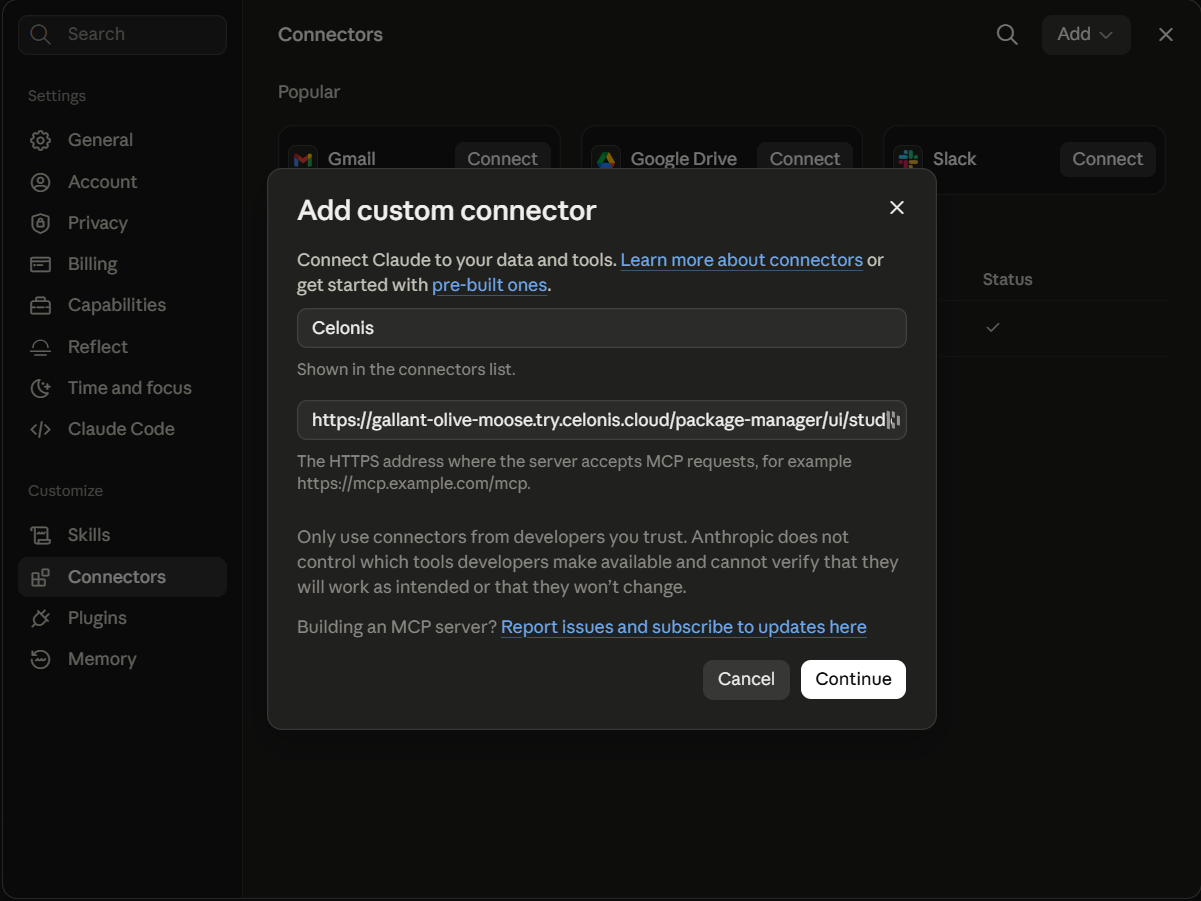
- Open Claude and go to Customize > Connectors.
- Click Add custom connector.
- Enter a Name, such as "Celonis".
- In Remote MCP server URL, paste your MCP Server URL from Step 1. Click Continue.
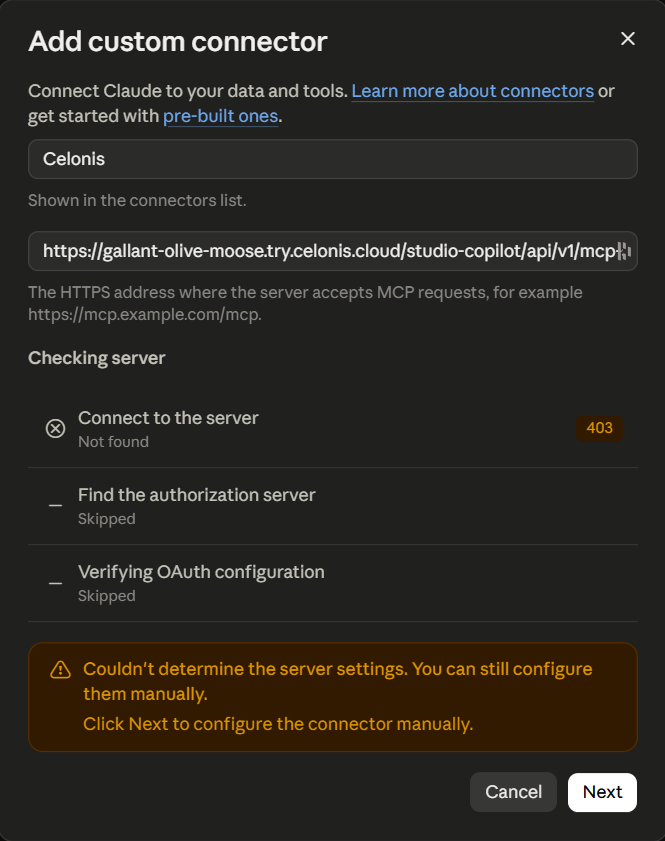
- When you get the following message, click Next: "Couldn't determine the server settings. You can still configure them manually. Click Next to configure the connector manually."
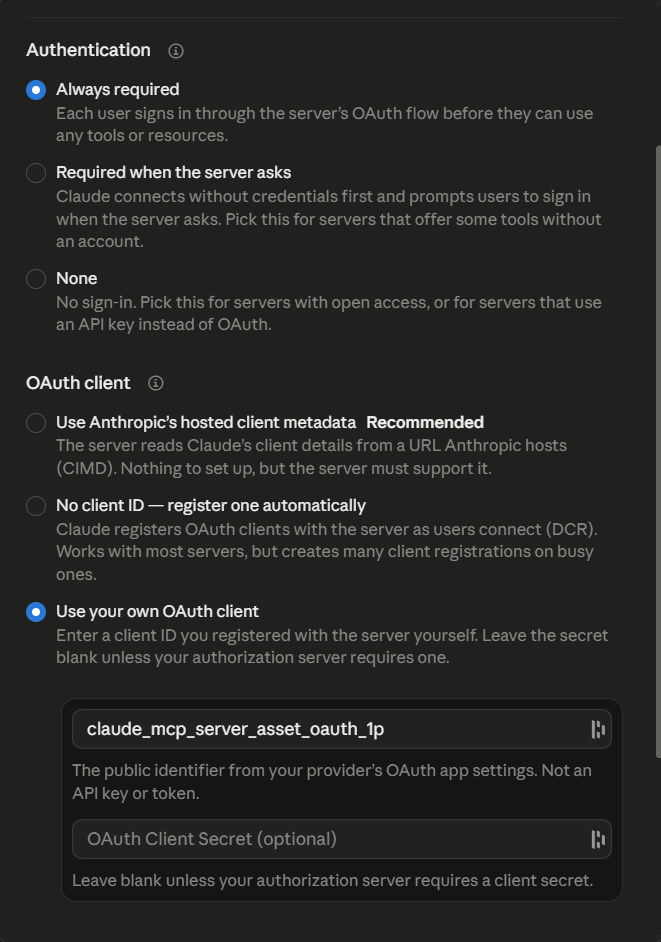
- In the following window, under Authentication select "Always required" and under OAuth client select "Use your own OAuth client".
- Enter the OAuth Client ID:
claude_mcp_server_asset_oauth_1p. - Leave the OAuth Client Secret field empty.
- Click Add/Connect.
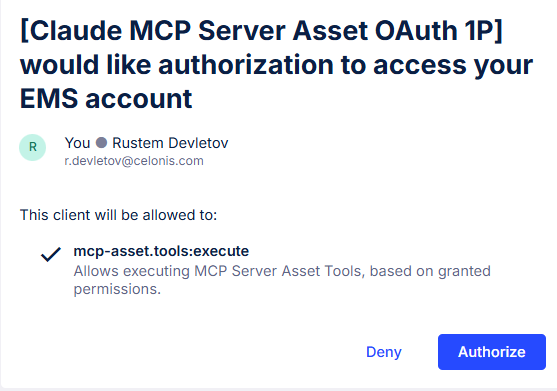
- Claude redirects you to Celonis. Sign in to your Celonis account if you are not already signed in.
- Celonis shows a consent screen listing the access Claude is requesting - the
mcp-asset.tools:executescope. Review the request and click Authorize.
- You are returned to Claude. Verify that the connector shows as connected.
Open the connector's settings in Claude. You can see all the tools published by your Agent Tools (MCP Server) Asset. You can enable or disable individual tools from this screen if you only want Claude to use a subset of those tools.
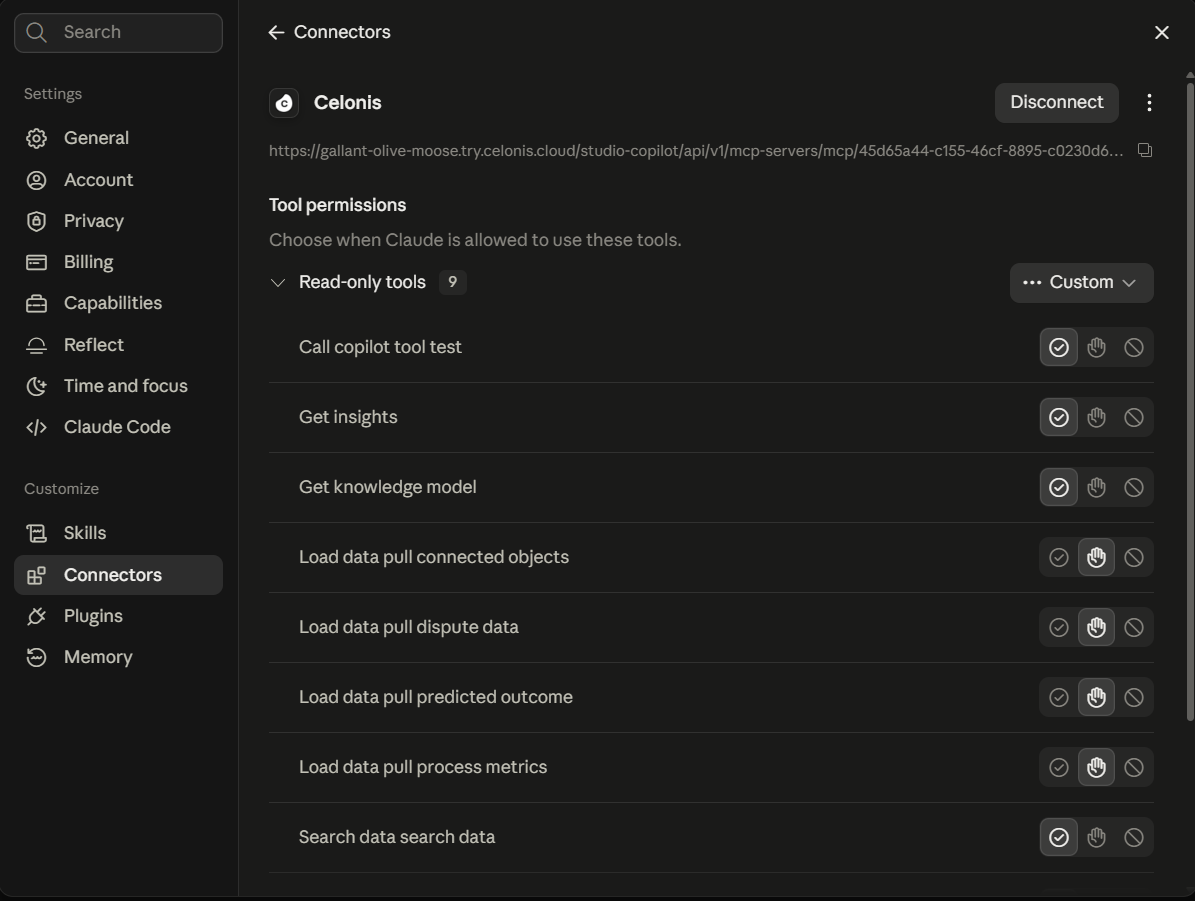
Start a new conversation and ask Claude a question that requires your Celonis tools. Claude asks for your approval the first time it calls a tool and then shows you the tool call and its result inline.
The same Celonis client works with Claude Code, so developers can use your Celonis tools from the command line.
claude mcp add --transport http \
  --client-id claude_mcp_server_asset_oauth_1p \
  celonis https://[team].[realm].celonis.cloud/studio-copilot/api/v1/mcp-servers/mcp/[mcp-server-id]
Run /mcp inside Claude Code to start the authorization flow, then confirm the server shows as connected.
To share the configuration with a team through version control, commit a .mcp.json file in your repository root:
{
  "mcpServers": {
    "celonis": {
      "type": "http",
      "url": "https://${CELONIS_TEAM}.${CELONIS_REALM}.celonis.cloud/studio-copilot/api/v1/mcp-servers/mcp/${CELONIS_MCP_SERVER_ID}",
      "oauth": {
        "clientId": "claude_mcp_server_asset_oauth_1p"
      }
    }
  }
}
Each developer sets CELONIS_TEAM, CELONIS_REALM and CELONIS_MCP_SERVER_ID in their own environment, so one file works across teams and assets.
If you encounter issues:
- Check that your MCP Server URL is correct and that your Agent Tools (MCP) Asset is published.
- Confirm the Client ID is exactly
claude_mcp_server_asset_oauth_1pand that the Client Secret field is empty. - If authorization fails immediately, sign in to your Celonis team in a browser first, then retry Connect. The connector requires an interactive sign-in and cannot use a Celonis API key or application key.
- If the tool list is empty after a successful connection, disconnect and then reconnect the connector so Claude refreshes the tool list.